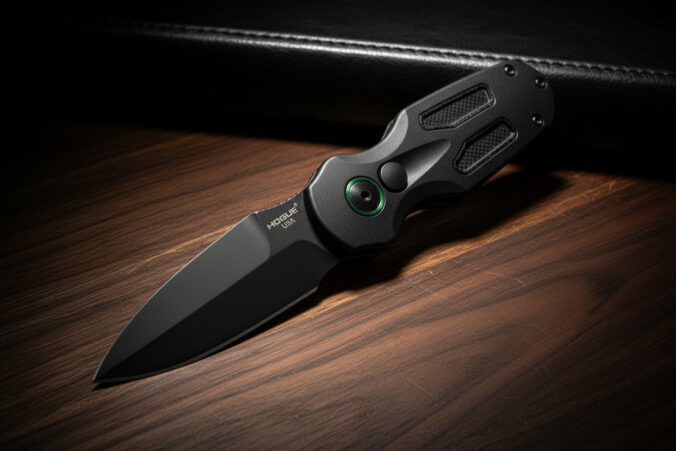
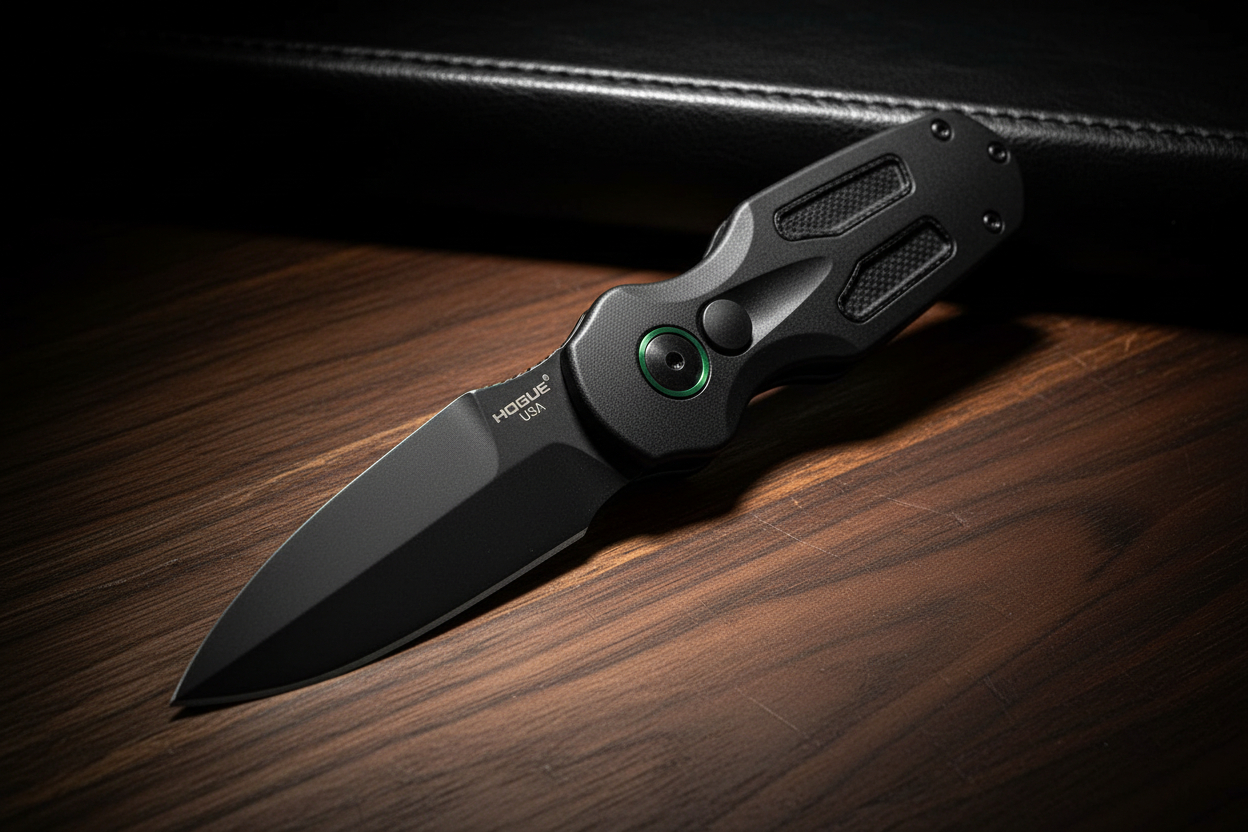
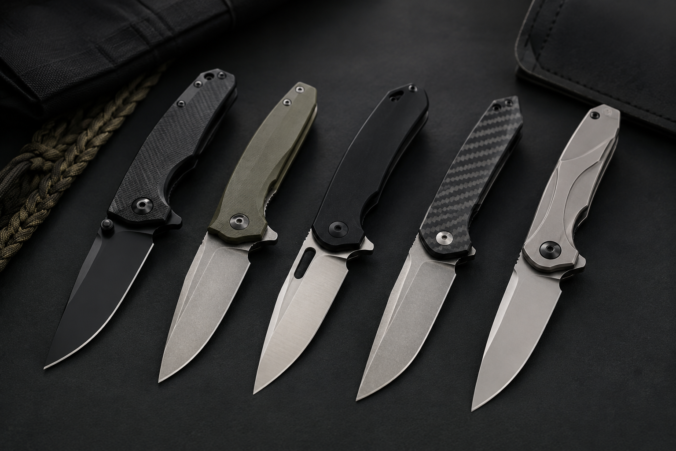
Some knives are built to become part of your everyday rotation.
Others are built to make collectors pay attention.
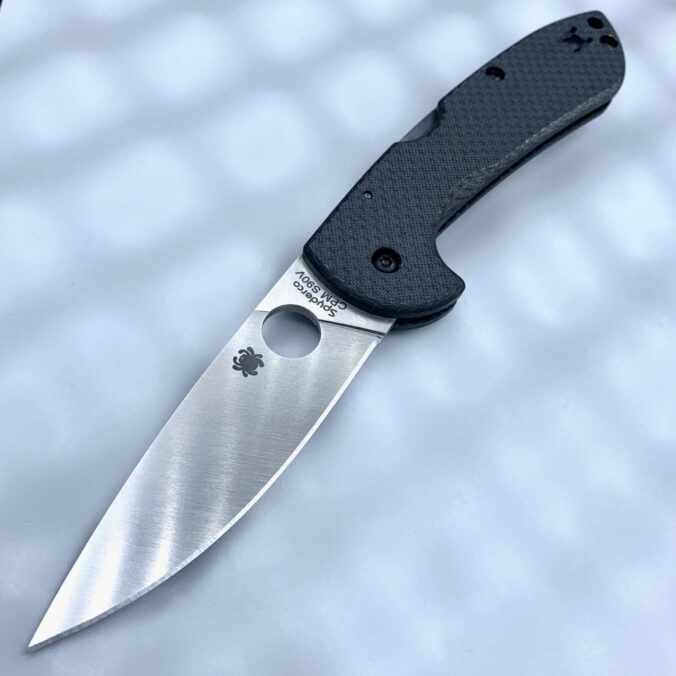
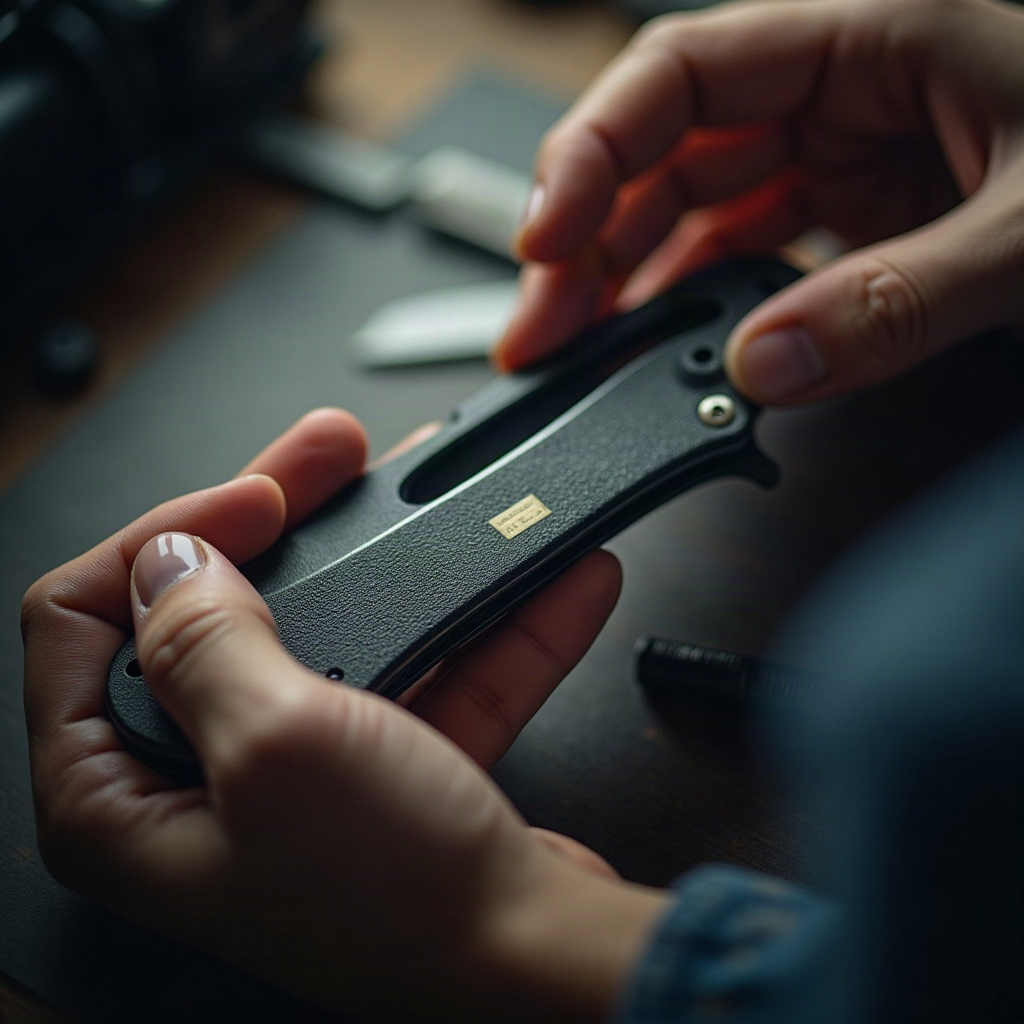
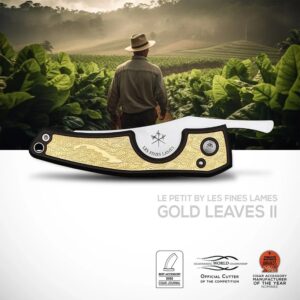
The Spyderco Siren C247CFP Sprint Run falls firmly into that second category — a limited-edition Spyderco folding knife with upgraded materials, a distinctive profile, and the kind of scarcity that makes Sprint Runs so appealing.
This week, Knife Depot members can save $15 in cart on this collector-worthy Spyderco feature.
A Sprint Run Worth Watching
Spyderco Sprint Runs have a special place with knife collectors because they are limited by nature. These are not standard catalog knives that sit around forever. Sprint Runs often bring together an existing design with special materials, unique finishes, or upgraded steel — and once they are gone, they can be difficult to find again.
That is what makes the Siren C247CFP Sprint Run such a strong feature.
This version of the Siren pairs a sleek carbon fiber handle with premium CPM S90V steel, giving the knife a refined, elevated feel that stands apart from the everyday folder.
Carbon Fiber Meets CPM S90V
The carbon fiber handle gives this Siren a clean, modern look with the kind of visual depth collectors tend to appreciate. It feels premium without being loud.
The CPM S90V blade steel is another major part of the appeal. Known for excellent edge retention, S90V is the kind of steel that gets attention from knife people who care about performance as much as collectibility.
Together, the carbon fiber and S90V combination makes this Sprint Run feel purposeful, premium, and limited in all the right ways.
Why Collectors Should Look Now
The Spyderco Siren already has a distinctive profile, and this Sprint Run treatment makes it even more interesting.
It is not just another knife with a different handle scale. It is a limited-edition Spyderco with a strong materials story, collector appeal, and a one-week members-only offer from Knife Depot.
Why We Like It:
Limited-edition Spyderco Sprint Run
Carbon fiber handle
Premium CPM S90V blade steel
Distinctive Siren profile
Strong collector appeal
Great fit for Spyderco fans
Members save $15 in cart for one week only
Members Save $15 This Week Only
For one week only, Knife Depot members save $15 in cart on the Spyderco Siren C247CFP Sprint Run.
If Sprint Runs are your weakness, this is the kind of knife worth looking at before the opportunity disappears.
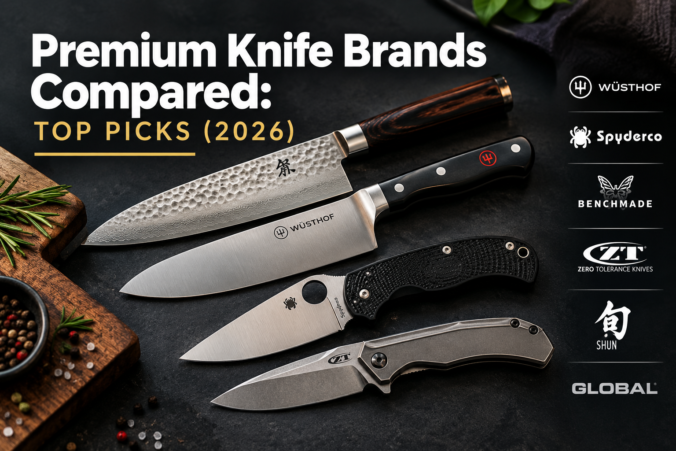
TL;DR: Premium knife brands differ dramatically in steel hardness (HRC 56–63), edge angles (14–16° per side), and long-term value. A $165 Wüsthof Classic costs just $6.60/year over 25 years – cheaper than replacing a $40 knife every 3 years ($13.33/year). Best overall: MAC Professional MTH-80 ($145, HRC 60–61) for performance-per-dollar; best German: Wüsthof Classic ($165, HRC 58) for durability; best Japanese: Shun Classic ($185, HRC 60–61) for razor sharpness plus free lifetime sharpening.
What Makes a Knife Brand Truly Premium?
Before you drop $150–$350 on a single knife, you need to understand what separates premium brands from the rest. It’s not marketing hype – it’s measurable metallurgy.
Premium knife brands compete on six core specs: steel type, Rockwell hardness (HRC), edge angle, handle materials, warranty coverage, and country of origin. Let’s decode each one.
Steel type determines edge retention and corrosion resistance. Wüsthof uses X50CrMoV15, a German stainless with 15% chromium and molybdenum for flexibility. Shun uses VG-10, a Japanese high-carbon steel that holds an edge longer but chips more easily. uses a specialized manufacturing process to achieve extreme hardness (HRC 63) with finer grain structure.
Rockwell hardness (HRC) measures how hard the steel is on a scale of 0–100. German knives typically run HRC 56–60; Japanese knives run HRC 60–67. Higher HRC = longer edge retention but increased brittleness. Think of it like this: a softer knife dulls faster but won’t chip on bones. A harder knife stays sharp longer but can snap if you hit something hard.
Edge angle is the angle ground into each side of the blade. German knives use 14–20° per side (28–40° total); Japanese knives use 13–16° per side (26–32° total). Sharper angles = finer edge but less durability. Wider angles = tougher edge but less sharp.
Handle materials range from wood (Miyabi Birchwood) to synthetic resin (Shun’s D-shaped handle) to all-steel (Global). Premium handles balance grip comfort, durability, and aesthetics.
Warranty separates brands that stand behind their products. Wüsthof and Shun both offer lifetime warranties against manufacturing defects. Shun adds a free lifetime sharpening program – mail your knife in, they sharpen it, you pay only shipping. That’s $200–$400 in value over a knife’s life.
Country of origin matters for quality control. German knives come from Solingen (Wüsthof, Henckels). Japanese knives come from Seki (Shun, Miyabi, MAC). Both regions have centuries of cutlery expertise and strict production standards.
Key Takeaway: Premium knives differ by HRC hardness (56–63), edge angle (14–20° per side), and steel composition. German knives prioritize durability; Japanese knives prioritize sharpness. Your choice depends on how you cook.
How Do the Top Premium Knife Brands Stack Up?
Here’s the side-by-side comparison you came for. We’ve pulled specs from official brand pages and independent testing to show you exactly what you’re paying for.
Brand
Origin
Steel
HRC
Edge Angle
Entry Price (8″)
Warranty
Wüsthof Classic
Germany
X50CrMoV15
58
14° per side
$165
Lifetime
Shun Classic
Japan
VG-10 core
60–61
16° per side
$185
Lifetime + free sharpening
Japan
SG2 powder steel
63
9.5° per side
$330
Limited lifetime
MAC Professional MTH-80
Japan
High-carbon molybdenum
60–61
15° per side
$145
Limited lifetime
Global G-2
Japan
Cromova 18
56–58
15° per side
$85
Limited
Victorinox Fibrox Pro
Switzerland
Stainless steel
56
15° per side
$55
Limited
German Knife Brands: Wüsthof & Henckels
Wüsthof Classic is the gold standard for German knives. At $165 for the 8-inch, it uses forged X50CrMoV15 steel hardened to HRC 58 with a 14° edge angle per side. The full bolster (the metal collar where blade meets handle) adds weight and balance but makes sharpening to the heel impossible without professional equipment.
Why choose Wüsthof? According to America’s Test Kitchen, it’s the best German-style knife for long-term durability and edge retention. The softer steel (HRC 58) means it dulls faster than Japanese knives, but it’s nearly impossible to chip – even if you hit a bone or frozen vegetable. German knives forgive sloppy technique.
Henckels confusion alert: Zwilling J.A. Henckels and Henckels International are two completely different product lines. Zwilling (the parent company) makes forged knives at premium prices. Henkcels International makes stamped knives at budget prices. Both carry the Henkcels name. Don’t mix them up.
Key Takeaway: German knives (HRC 56–60) are forgiving, durable, and require less maintenance than Japanese knives. Best for home cooks who want a knife that survives abuse.
Japanese Knife Brands: Shun, Miyabi, MAC, Global
Shun Classic is the entry point to premium Japanese knives. At $185, it uses a VG-10 steel core clad in 34 layers of Damascus stainless, hardened to HRC 60–61 with a 16° edge angle per side. The D-shaped handle fits Western hands better than traditional octagonal handles.
What makes Shun stand out? Shun offers a free lifetime sharpening program – mail your knife in, they sharpen it, you pay shipping only. At $20–$40 per professional sharpening, that’s $200–$400 in value over a knife’s life. The VG-10 steel holds an edge 2–3× longer than German knives, but it’s more brittle. Don’t use it on bones or frozen food.
is the premium Japanese option at $330. It uses SG2 powder steel hardened to HRC 63 – the hardest steel in this comparison. than conventionally forged steel, allowing extreme hardness with less brittleness relative to that hardness. The 9.5° edge angle per side is razor-sharp. The birchwood handle is beautiful but requires hand-washing and occasional oiling.
MAC Professional MTH-80 is the consensus best-value Japanese knife. At $145, it uses high-carbon molybdenum steel hardened to HRC 60–61 with a 15° edge angle. The dimple-etched blade (Granton-style hollows) reduces food sticking – a practical feature Shun doesn’t offer at this price. According to Serious Eats, MAC matches or exceeds Shun in independent edge retention tests while costing $40 less.
Global G-2 is the budget Japanese option at $85. It uses proprietary Cromova 18 stainless steel (HRC 56–58) with an all-steel construction and dimpled handle. The all-steel design is hygienic and durable but slippery when wet – a legitimate safety concern flagged in multiple reviews.
Key Takeaway: Japanese knives (HRC 60–67) stay sharp 2–3× longer than German knives but chip more easily on hard foods. Best for enthusiasts who sharpen regularly and cook mostly vegetables and proteins.
Price vs. Long-Term Value: What Are You Actually Paying Per Year?
Here’s where premium knives make financial sense. Most people compare sticker prices and assume a $40 knife is “good enough.” They’re wrong.
The cost-per-year formula is simple:
(Purchase Price ÷ Expected Lifespan in Years) = Annual Cost
Let’s run the numbers:
Wüsthof Classic 8″ at $165 ÷ 25-year lifespan = $6.60/year
Shun Classic 8″ at $185 ÷ 20-year lifespan = $9.25/year
Miyabi Birchwood SG2 at $330 ÷ 20-year lifespan = $16.50/year
MAC Professional MTH-80 at $145 ÷ 20-year lifespan = $7.25/year
Off-brand $40 knife replaced every 3 years = $13.33/year
The off-brand knife costs 2× more per year than a Wüsthof, even though the sticker price is lower.
Why? Premium knives last 20–25 years with proper care. Budget knives last 2–3 years before the edge becomes impossible to sharpen. You’re not paying for a knife; you’re paying for decades of reliable performance.
Add sharpening costs. Professional sharpening runs $15–$30 per knife and is recommended every 1–2 years for regular home cooks. Premium knives hold an edge 2–3× longer, so you sharpen less often. A Wüsthof might need sharpening every 18–24 months; a budget knife every 6–12 months.
Over 25 years:
Wüsthof: 12–15 sharpenings × $20 = $240–$300 in maintenance
Budget knife: 25–50 sharpenings × $20 = $500–$1,000 in maintenance
Total cost of ownership (purchase + sharpening):
Wüsthof: $165 + $270 = $435 over 25 years = $17.40/year
Budget knife: $40 × 8 replacements + $750 sharpening = $1,070 over 25 years = $42.80/year
The premium knife costs 60% less over its lifetime.
Key Takeaway: A $165 Wüsthof costs $6.60/year in purchase cost alone – cheaper than replacing a $40 knife every 3 years. Factor in sharpening, and premium knives save you $25–$30/year.
Which Premium Knife Brand Should You Choose?
Your cooking style, budget, and maintenance tolerance matter more than brand prestige. Here’s how to match yourself to the right knife.
Profile 1: Home cook wanting durability + low maintenance → Wüsthof Classic or Victorinox Fibrox Pro
You cook 3–5 times per week, mostly vegetables and proteins. You don’t sharpen knives yourself and prefer to hand-wash and forget. You want a knife that survives abuse.
Wüsthof Classic ($165) is the premium choice – HRC 58 steel is forgiving, the full bolster adds weight and balance, and the lifetime warranty covers manufacturing defects. You’ll sharpen it every 18–24 months at a local shop ($20–$30). It’ll outlive your kitchen.
Victorinox Fibrox Pro ($55) is the budget alternative – America’s Test Kitchen rates it as best value. HRC 56 steel dulls faster, but the stamped construction is lighter and more nimble. Perfect for beginners or gift-givers.
You cook 5+ times per week, mostly vegetables and delicate proteins. You sharpen your own knives with a whetstone or send them to Shun’s free program. You appreciate beautiful handles and want the sharpest edge possible.
Shun Classic ($185) is the sweet spot – VG-10 steel at HRC 60–61 holds an edge 2–3× longer than German knives. The 34-layer Damascus cladding looks stunning. The free lifetime sharpening program saves you $200–$400 over the knife’s life. The D-shaped handle fits Western hands.
Miyabi Birchwood SG2 ($330) is the luxury choice – SG2 powder steel at HRC 63 is the sharpest steel in this comparison. The 9.5° edge angle per side is razor-thin. The birchwood handle is hand-finished and requires occasional oiling. Best for collectors or professional home cooks.
Profile 3: Professional or serious home chef wanting performance per dollar → MAC Professional MTH-80
You cook 6+ days per week, handle whole proteins, and need a knife that performs without the premium price tag. You sharpen regularly and don’t mind a utilitarian handle.
MAC Professional MTH-80 ($145) is the consensus winner among culinary schools and professional testers. HRC 60–61 steel matches Shun’s edge retention. The dimple-etched blade reduces food sticking – a practical feature Shun doesn’t offer. At $40 cheaper than Shun, it’s the best value Japanese-style knife.
Profile 4: Gift buyer with $200+ budget → Shun Classic or Wüsthof Ikon
You’re buying for someone who cooks regularly but you don’t know their exact preferences. You want something that looks premium and performs reliably.
Shun Classic ($185) is the safe choice – beautiful Damascus cladding, free lifetime sharpening, lifetime warranty. It works for both enthusiasts and home cooks.
Wüsthof Ikon ($220) is the alternative – same steel and edge angle as Classic, but with a half-bolster design that allows full-blade sharpening to the heel. More refined handle. Same HRC 58 durability.
Handle preference matters. Western D-shaped handles (Shun, Wüsthof) fit larger hands and feel heavier. Japanese octagonal handles (Miyabi) fit smaller hands and feel lighter. Global’s all-steel handle is hygienic but slippery.
Maintenance differences. German knives (HRC 56–60) are more forgiving on honing rods and can tolerate occasional dishwasher exposure (though not recommended). Japanese knives (HRC 60–67) require whetstones and hand-washing only – the harder steel chips if you use a honing rod incorrectly.
Key Takeaway: Match your cooking style to the knife. Durability seekers: Wüsthof. Sharpness seekers: Shun or Miyabi. Budget-conscious: MAC Professional. Beginners: Victorinox Fibrox Pro.
What Are the Limitations of Premium Knife Brands?
Premium knives aren’t magic. They have real limitations you need to understand before buying.
Japanese knives chip on hard foods. Higher Rockwell hardness means the steel is more brittle. Shun at HRC 60–61 and Miyabi at HRC 63 can chip if you use them on bones, frozen vegetables, or hard squash. German knives at HRC 56–60 are more forgiving. If you break down whole chickens regularly, choose German.
German knives dull faster. Softer steel (HRC 56–60) loses its edge quicker than Japanese steel (HRC 60–67). You’ll sharpen a Wüsthof every 18–24 months; a Shun every 24–36 months. This isn’t a deal-breaker – it’s just maintenance reality.
Premium brands don’t compensate for poor technique. A $300 Miyabi won’t perform well if you use a glass cutting board (it will dull instantly) or a honing steel incorrectly (it will chip). Use wood or plastic boards. Use whetstones, not honing steels, for Japanese knives.
Dishwasher use damages all premium knives. All major brands explicitly warn against dishwasher use. Handle materials (pakkawood, resin, wood) crack and delaminate. Blade edges oxidize from prolonged heat and moisture. Hand-wash only. It takes 30 seconds.
No knife brand compensates for a poor cutting board. Glass and stone boards dull knives instantly. Ceramic boards are slightly better but still harsh. Use wood (maple, walnut) or plastic (polyethylene) boards. Your $300 knife deserves a $30 board.
Key Takeaway: Premium knives require proper technique, maintenance, and equipment. They’re not foolproof. Japanese knives chip on bones; German knives dull faster. Hand-wash only. Use wood boards.
Frequently Asked Questions
Is a $200 knife worth it compared to a $50 knife?
Direct Answer: Yes, if you cook regularly and plan to keep the knife 15+ years. A $165 Wüsthof costs $6.60/year; a $50 budget knife costs $13.33/year when replaced every 3 years.
Over 25 years, the premium knife saves you $25–$30/year in purchase and sharpening costs combined. If you cook fewer than 3 times per week or replace knives every 2–3 years anyway, a budget knife is fine.
What is the difference between Japanese and German premium knife brands?
Direct Answer: German knives (HRC 56–60, 14–20° edge angle) prioritize durability and forgiveness. Japanese knives (HRC 60–67, 13–16° edge angle) prioritize sharpness and edge retention.
German knives use softer stainless steel that dulls faster but resists chipping. Japanese knives use harder high-carbon steel that holds an edge 2–3× longer but chips more easily on bones or frozen food. German knives need sharpening every 18–24 months; Japanese knives every 24–36 months. Choose German if you cook whole proteins; choose Japanese if you cook mostly vegetables.
Which premium knife brand has the best warranty?
Direct Answer: Shun and Wüsthof both offer lifetime warranties against manufacturing defects. Shun adds a free lifetime sharpening program – mail your knife in, they sharpen it, you pay shipping only.
Shun’s free sharpening program is worth $200–$400 over a knife’s life. Global and MAC offer limited warranties (typically 1–5 years). If warranty matters to you, choose Shun or Wüsthof.
Can you put premium knives in the dishwasher?
Direct Answer: No. All major premium brands explicitly warn against dishwasher use. Handle materials crack and delaminate; blade edges oxidize.
Hand-wash your premium knife in 30 seconds with warm soapy water and a soft cloth. Dry immediately. This takes less time than loading a dishwasher and protects your investment.
What is the best premium knife brand for beginners?
Direct Answer: Victorinox Fibrox Pro ($55) for budget-conscious beginners, or Wüsthof Classic ($165) for beginners willing to invest.
America’s Test Kitchen rates Victorinox Fibrox Pro as best value. It’s forgiving, durable, and teaches proper technique without the premium price. Wüsthof Classic is the premium beginner choice – HRC 58 steel is nearly impossible to chip, and the lifetime warranty covers mistakes.
How often do premium knives need sharpening?
Direct Answer: German knives (HRC 56–60) need sharpening every 18–24 months. Japanese knives (HRC 60–67) need sharpening every 24–36 months. Home cooks who cook 3–5 times per week typically sharpen once per year.
Professional sharpening costs $15–$30 per knife. Whetstone sharpening at home costs $0 per session after a $50–$150 stone investment. Shun offers free lifetime sharpening via mail-in program.
Are Wüsthof and Henkcels the same quality?
Direct Answer: No. Zwilling J.A. Henkcels (forged) and Henkcels International (stamped) are two completely different product lines. Zwilling forged knives are premium-tier; Henkcels International stamped knives are budget-tier.
Both use the Henkcels name, which causes buyer confusion. If you want premium German quality, look for “Zwilling J.A. Henkcels” (forged) or stick with Wüsthof. Henkcels International is a budget alternative to Victorinox.
The Bottom Line
Premium knife brands compete on measurable specs: steel hardness (HRC 56–63), edge angle (14–20° per side), and warranty coverage. Wüsthof Classic ($165, HRC 58) is the best German knife for durability. Shun Classic ($185, HRC 60–61) is the best Japanese knife for sharpness plus free lifetime sharpening. MAC Professional MTH-80 ($145, HRC 60–61) is the best value Japanese-style knife.
The real insight: premium knives cost less per year than budget knives when you factor in lifespan and sharpening. A $165 Wüsthof costs $6.60/year over 25 years. A $40 budget knife costs $13.33/year when replaced every 3 years.
Your choice depends on cooking style. Cook whole proteins? Choose German (Wüsthof). Cook mostly vegetables? Choose Japanese (Shun or Miyabi). Want the best value? Choose MAC Professional.
If you’re ready to invest in a premium knife that’ll outlive your kitchen, Knife Depot carries all the brands mentioned here – Wüsthof, Shun, Miyabi, MAC, and more. Browse their selection, read customer reviews, and find the knife that matches your cooking style.
Hand-wash it. Use a wood board. Sharpen every 18–36 months. It’ll serve you for decades.
Upgrade Your Everyday Carry
Built for performance. Designed to stand out. Shop knives ready for everyday carry, the outdoors, or your collection.
TL;DR: – Benchmade automatic knives range from ~$150 to $600+, with flagship OTF models like the Infidel 3300 at ~$420 street price
Federal law prohibits interstate switchblade sales, but state laws vary dramatically – Texas allows automatics under 5.5 inches while California restricts concealed carry to 2-inch blades
Purchase only from authorized dealers (Benchmade.com, BladeHQ, KnifeCenter, Knife-Depot) to preserve LifeSharp warranty eligibility and avoid counterfeits
What Makes Benchmade Automatic Knives Worth Buying?
Benchmade was founded in 1988 in Oregon City, Oregon – and every knife is still designed and manufactured in the USA. That's not marketing fluff. It matters when you're dropping $400+ on a blade.
Here's what separates Benchmade automatics from the pack: the AXIS lock mechanism uses a sliding bar with an omega spring that provides ambidextrous, one-handed operation. You get smooth deployment and reliable lockup without the complexity of traditional frame locks. For OTF models like the Infidel and other OTF automatics, you're getting precision-machined aluminum handles paired with premium blade steels (D2, S30V, or CPM-M4 depending on the model).
Benchmade automatic knives range from approximately $150 to over $600, depending on mechanism type and blade steel. Entry-level side-opening automatics start around $150–$200. Mid-tier OTF models run $300–$450. Limited editions and premium variants push past $600.
The real value? Benchmade's LifeSharp service offers factory sharpening for approximately $5 per blade with return shipping included. That's $10–$20 annually versus $30–$50 at third-party sharpeners. Over a knife's lifetime, that adds up.
Key Takeaway: Benchmade automatics cost 2–3× more than budget brands but include lifetime warranty coverage, factory sharpening access, and precision manufacturing that justifies the price for serious users.
Are Automatic Knives Legal in Your State?
This is the question that stops most buyers cold. And rightfully so.
The practical reality: if you live in New York, Illinois, or Massachusetts, a Benchmade automatic is illegal to own. Period. If you're in Texas or Arizona, you're clear. If you're in California, you can own one at home but face blade-length restrictions for carry.
Key Takeaway: Federal law prohibits interstate switchblade sales, but state laws vary from fully permissive (Texas, Arizona) to outright bans (New York, Illinois). Verify your state's specific statute before ordering.
Top Benchmade Automatic Knife Models Compared (2026)
Let's cut through the noise. Here are the models actually worth considering, with real specs and street pricing.
Model
Type
Blade Length
Steel
Mechanism
Street Price
Best For
Infidel 3300
OTF
3.91"
D2
Double-action
$400–$450
Tactical/collector
Pagan OTF 3400
OTF
3.40"
CPM-S30V
Double-action
$350–$400
EDC/lighter carry
Presidio II Auto 5750
Side-opening
3.72"
CPM-S30V
AXIS-assisted
$200–$250
EDC/everyday
Mini Reflex II 6850
Side-opening
2.70"
154CM
AXIS-assisted
$175–$200
Lightweight carry
Claymore Auto 9070
Side-opening
3.45"
CPM-M4
AXIS-assisted
$250–$300
Heavy-duty work
The Infidel 3300 ($400–$450): This is the flagship. The Benchmade Infidel 3300 features a 3.91-inch D2 tool steel blade, 6061-T6 anodized aluminum handle, and double-action out-the-front mechanism. D2 is semi-stainless – it'll hold an edge like a beast but requires maintenance in humid climates. The OTF mechanism is smooth, and the aluminum handle is lightweight. Pros: iconic design, reliable deployment, excellent edge retention. Cons: D2 rusts without care, heavier than side-opening folders, premium price tag.
The Pagan OTF 3400 ($350–$400): The Benchmade Pagan 3400 OTF is a double-action out-the-front automatic featuring CPM-S30V steel and an anodized aluminum handle optimized for EDC carry. S30V is a stainless steel – better corrosion resistance than D2, slightly less edge retention. Lighter than the Infidel. Pros: stainless steel, EDC-optimized size, $50–$100 cheaper. Cons: smaller blade, less aggressive aesthetic.
The Presidio II Auto 5750 ($200–$250): The Benchmade Presidio II Auto 5750 uses CPM-S30V steel with a side-opening automatic mechanism, 3.72-inch blade, and G10 handle. This is the sweet spot for most buyers. Side-opening automatics are less intimidating than OTF knives in many jurisdictions. Pros: affordable, reliable, stainless steel, legal in more states. Cons: slower deployment than OTF, less tactical aesthetic.
The Mini Reflex II 6850 ($175–$200): Compact, lightweight, 154CM steel (a solid mid-tier stainless). Best if you want automatic convenience without the bulk. Pros: affordable entry point, pocket-friendly. Cons: smaller blade limits utility.
The Claymore Auto 9070 ($250–$300): CPM-M4 steel offers superior edge retention versus S30V but with slightly lower corrosion resistance, making it suited for heavy-use rather than wet environments. This is the workhorse. Pros: premium steel, excellent edge retention, heavy-duty build. Cons: requires maintenance, overkill for casual carry.
OTF vs. Side-Opening Benchmade Autos: Which Should You Choose?
OTF (out-the-front) knives deploy the blade straight forward. Side-opening automatics deploy from the side like a traditional folder.
OTF pros: faster deployment, tactical aesthetic, impressive. OTF cons: illegal in more states, more expensive, more complex mechanism.
Side-opening pros: legal in more jurisdictions, simpler mechanism, lower price, easier to carry discreetly. Side-opening cons: slower deployment, less dramatic.
If you're in a restrictive state or want everyday carry without drawing attention, go side-opening. If you're in a permissive state and want tactical capability, OTF is worth the premium.
Key Takeaway: The Presidio II Auto ($200–$250) is the best value for most buyers. The Infidel 3300 ($400–$450) is the flagship for collectors and tactical users. Choose OTF for speed and presence; choose side-opening for legality and discretion.
How Much Do Benchmade Automatic Knives Cost?
Direct answer: Benchmade automatic knives range from $150 (entry) to $600+ (limited editions). Most buyers spend $200–$400.
Here's the pricing breakdown by tier:
Entry tier ($150–$200): Mini Reflex II, basic side-opening automatics. 154CM or 440C steel. Good for first-time auto buyers or lightweight carry.
Mid tier ($200–$350): Presidio II Auto, Pagan OTF. CPM-S30V steel, proven mechanisms. Sweet spot for EDC and collectors.
Premium tier ($350–$600+): Infidel 3300, limited editions, CPM-M4 variants. D2 or premium stainless. For serious users and collectors.
The price difference explained: A $400 Infidel versus a $200 Presidio II isn't just about blade steel. You're paying for OTF mechanism complexity (dual-action requires precision machining), D2 steel (harder to machine than S30V), and aluminum handle finishing. The Infidel is also a collector's piece – scarcity and brand prestige factor into pricing.
Street price vs. MSRP: Benchmade's authorized dealers typically discount 10–15% below MSRP. If you see a Benchmade auto priced 40%+ below MSRP, it's either grey-market stock or counterfeit. Avoid it.
LifeSharp value calculation: Benchmade's LifeSharp service costs approximately $5 per blade. If you sharpen twice yearly, that's $10 annually. Third-party sharpening runs $30–$50 per blade. Over 10 years, LifeSharp saves you $200–$400 per knife. That's real money.
Key Takeaway: Budget $200–$250 for a solid EDC automatic (Presidio II), $400–$450 for a flagship OTF (Infidel). Factor in $10–$20 annually for LifeSharp maintenance – a major cost advantage over third-party sharpening.
Where to Buy Benchmade Automatic Knives (Authorized vs. Grey Market)
You have two paths: authorized dealers or grey-market sellers. The difference matters.
Knife-Depot (specialist retailer with expert support)
Red flags for grey-market/counterfeit sellers:
Pricing 40%+ below MSRP (legitimate dealers can't discount that much)
No return policy or 30-day returns only
No warranty information provided
Seller has no knife industry reputation
Photos look stock/generic (not actual product images)
Why this matters: Purchasing Benchmade knives from unauthorized dealers voids LifeSharp warranty service and increases counterfeit risk. Counterfeit OTF knives are documented in knife forums – poor machining, weak springs, blade wobble. You're not just losing warranty; you're getting an inferior product.
Online vs. in-store: Online offers convenience and price transparency. In-store lets you handle the knife, test the mechanism, and verify authenticity before purchase. If you're spending $400+, handling it first is worth the trip.
Age verification and ID: Automatic knife purchases require age verification in most states. Expect to provide ID at checkout (online retailers use third-party verification services). This is legal requirement, not dealer preference.
Key Takeaway: Buy from authorized dealers only (Benchmade.com, BladeHQ, KnifeCenter, Knife-Depot). Avoid sellers pricing 40%+ below MSRP. Authorized purchase preserves LifeSharp eligibility and guarantees authenticity.
What to Look for Before You Buy a Benchmade Automatic Knife
You've narrowed it down. Now comes the decision matrix.
Blade steel: The core choice
D2 tool steel offers high wear resistance and edge retention but is semi-stainless (lower chromium than full stainless) and can rust without maintenance. Best for: dry climates, users willing to maintain. Worst for: coastal areas, humid environments.
CPM-S30V is a premium stainless steel offering a balance of edge retention, toughness, and corrosion resistance, widely used in mid-tier Benchmade models. Best for: most users. Worst for: nobody – it's the Goldilocks steel.
CPM-M4 is a high-speed tool steel with exceptional wear resistance and toughness, outperforming S30V in edge retention but requiring more attention to rust prevention. Best for: heavy-use, dry conditions. Worst for: wet environments, low-maintenance users.
Deploy the blade 10 times. It should be smooth every time.
Retract should be equally smooth. Any grinding or hesitation = reject.
Check for blade wobble. Tight lockup is non-negotiable.
Carry position:
Tip-up (blade point up): faster draw, less discreet
Tip-down (blade point down): more discreet, slightly slower draw
Choose based on your use case.
Maintenance reality: Benchmade LifeSharp sharpening service costs approximately $5 per blade as of 2026. Budget $10–$20 annually if you use the knife regularly. D2 steel requires more frequent maintenance than S30V.
Key Takeaway: Choose S30V steel for balanced performance and low maintenance. Test mechanism smoothness in person if possible. Budget $10–$20 annually for LifeSharp service. Tip-down carry is more discreet; tip-up is faster.
Frequently Asked Questions About Benchmade Automatic Knives
Are Benchmade automatic knives legal to carry in my state?
Verify your state's specific statute using the AKTI state knife law database before purchasing. Blade length, concealed vs. open carry, and ownership at home all have different rules depending on your jurisdiction. This is not legal advice – consult local law enforcement or an attorney if you're unsure.
How much do Benchmade automatic knives cost in 2026?
Direct Answer: Benchmade automatic knives range from approximately $150 to over $600, depending on mechanism type and blade steel. Most buyers spend $200–$400.
Entry-level side-opening automatics start around $150–$200. Mid-tier OTF models run $300–$450. Limited editions and premium variants push past $600. Street prices are typically 10–15% below MSRP at authorized dealers.
What is the difference between the Benchmade Infidel and the Pagan OTF?
Direct Answer: The Infidel 3300 uses D2 steel and costs $400–$450; the Pagan 3400 uses CPM-S30V and costs $350–$400. The Infidel is larger (3.91" blade vs. 3.40"), heavier, and more aggressive. The Pagan is lighter, more EDC-optimized, and has better corrosion resistance.
Choose the Infidel if you want a flagship tactical knife and don't mind maintenance. Choose the Pagan if you want a lighter EDC knife with stainless steel. Both are excellent; it's about use case and budget.
Does Benchmade's LifeSharp warranty cover automatic knives?
Direct Answer: Yes, Benchmade's LifeSharp service covers all Benchmade knives, including automatics. Factory sharpening costs approximately $5 per blade with return shipping included.
However, purchasing from unauthorized dealers voids LifeSharp eligibility. Buy only from authorized retailers (Benchmade.com, BladeHQ, KnifeCenter, Knife-Depot) to preserve warranty coverage.
Where can I buy a genuine Benchmade automatic knife online?
Direct Answer: Buy from authorized dealers only: Benchmade.com, BladeHQ, KnifeCenter, or Knife-Depot. These retailers offer current pricing, authentic products, and warranty eligibility.
Avoid sellers pricing 40%+ below MSRP – they're likely grey-market or counterfeit. Verify the seller is listed on Benchmade's authorized dealer page before checkout.
What blade steel does Benchmade use in their automatic knives?
Direct Answer: Benchmade uses three primary steels in automatics: D2 (semi-stainless, high edge retention, requires maintenance), CPM-S30V (stainless, balanced performance, low maintenance), and CPM-M4 (premium tool steel, exceptional edge retention, requires maintenance).
D2 is semi-stainless and will rust without care. S30V is the Goldilocks steel – excellent corrosion resistance and edge retention. CPM-M4 outperforms S30V in edge retention but requires more attention to rust prevention. Choose based on your environment and maintenance tolerance.
Are Benchmade automatic knives worth the price compared to cheaper brands?
Direct Answer: Yes, for serious users. Benchmade automatics cost 2–3× more than budget brands but include lifetime warranty coverage, factory sharpening access, and precision manufacturing that justifies the premium.
Benchmade's LifeSharp service saves $200–$400 over a knife's lifetime compared to third-party sharpening. The AXIS lock mechanism is smoother and more reliable than budget alternatives. If you use the knife regularly, Benchmade is worth it. If you want a novelty, save money with a budget brand.
Key Takeaway: Benchmade automatics justify their price through warranty coverage, factory sharpening access, and superior mechanism design. Budget brands are cheaper upfront but cost more over time.
For personalized guidance on this topic, Knife Depot (https://knife-depot.com) can help you find the right approach for your situation.
Conclusion
Benchmade automatic knives sit at the intersection of performance, legality, and cost. You're not just buying a blade – you're buying access to factory sharpening, lifetime warranty coverage, and precision engineering that holds up under real use.
The Presidio II Auto ($200–$250) is your entry point. The Infidel 3300 ($400–$450) is your flagship. Both are excellent. The decision comes down to three factors: your state's legal landscape, your budget, and your use case.
Before you buy, verify your state's automatic knife laws. Purchase only from authorized dealers. Test the mechanism if possible. Budget $10–$20 annually for LifeSharp maintenance. Do this, and you'll own a knife that lasts decades.
Upgrade Your Everyday Carry
Built for performance. Designed to stand out. Shop knives ready for everyday carry, the outdoors, or your collection.
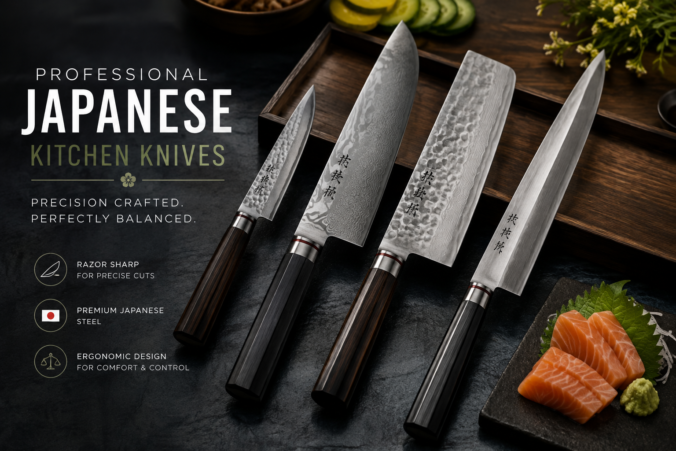
TL;DR: – Japanese professional knives are hardened to HRC 60–67, delivering finer edges than German knives but requiring technique adjustment to avoid chipping
VG-10 stainless ($80–$200) is the entry point; SG2 ($200–$450) holds edges 30–40% longer for professionals
A 210mm gyuto is the single most versatile first purchase for cooks transitioning from Western knives
Best value: $150 gyuto + $40 whetstone + $15 strop ($205 total) outperforms a $600 knife with no maintenance tools
Introduction
Based on our analysis of professional knife retailer guides, culinary publications, and specialist importer documentation collected through 2026, here’s what separates professional-grade Japanese kitchen knives from the rest.
You’re standing in front of a knife display. The German chef’s knife feels familiar – heavy, balanced, forgiving. The Japanese gyuto next to it looks thinner, almost delicate. But that apparent fragility masks something crucial: Japanese knives are typically hardened to between 60 and 67 HRC, compared to 56–58 HRC for most German knives, enabling a much thinner, more acute edge geometry.
This guide cuts through the mystique. We’ll walk you through steel grades, knife styles, real 2026 pricing, and the maintenance reality that separates casual buyers from people who actually use these knives daily. Whether you’re a home cook upgrading from a $30 block set or a culinary professional evaluating Japanese options, you’ll find the framework to choose the right knife for your kitchen – and your budget.
What Makes a Japanese Kitchen Knife Professional-Grade?
Professional-grade Japanese knives share three defining characteristics: extreme hardness, thin blade geometry, and a specific edge angle that demands technique modification.
The hardness difference is physical. Higher HRC hardness increases edge retention but reduces toughness – a knife at HRC 65 will hold an edge longer than one at HRC 58, but it will also chip or crack if used on bones or frozen food. This inverse relationship is the core tradeoff you’re making when you choose Japanese over German.
Blade geometry follows from hardness. Japanese knives taper to a 10–15 degree edge angle per side (20–30 degrees total), versus 20 degrees per side (40 degrees total) for German knives. That acute angle is only possible because the harder steel resists chipping. But it also means you can’t use the rocking chop motion that works on German knives – you’ll chip the blade.
Professional-grade means the knife is designed for high-volume, repetitive cutting in a kitchen where edge retention matters more than durability against abuse. It’s not about price; it’s about purpose.
Characteristic
Japanese
German
HRC Hardness
60–67
56–58
Edge Angle
10–15° per side
20° per side
Edge Retention
Excellent
Good
Toughness
Lower (chips easier)
Higher (more forgiving)
Sharpening Frequency
Every 3–6 months
Every 2–4 months
Maintenance
Hand wash, immediate dry
Dishwasher-safe options exist
Key Takeaway: Professional Japanese knives sacrifice toughness for sharpness. HRC 60–67 hardness enables 10–15° edge angles, but requires technique modification and careful maintenance to avoid chipping.
Which Japanese Knife Styles Do You Actually Need?
Most home cooks buy too many knives. Here’s what actually matters.
The gyuto (210–270mm) is the Japanese equivalent of the Western chef’s knife and the most versatile professional Japanese knife. At 210–270mm, it handles most kitchen tasks and is the best starting point for anyone new to Japanese knives. If you only buy one knife, buy a 210mm gyuto.
The santoku (165–180mm) is shorter, with a flat edge and a straighter profile. It’s the home-kitchen favorite – easier to control than a gyuto, better for precise vegetable work, but less versatile for proteins. Think of it as the Japanese answer to a 6-inch chef’s knife.
The nakiri (165–180mm) is a vegetable specialist. Its rectangular blade and flat edge excel at push-cutting through vegetables, but it’s not designed for proteins or bones. Professional vegetable prep stations use these; home cooks rarely need one.
The yanagiba (270–330mm single-bevel) is the professional standard for sashimi and raw fish fabrication. A 270mm is standard for most tasks; sushi chefs working with large fish like salmon typically prefer 300mm or longer. Single-bevel geometry means you sharpen only the front face – a different skill entirely.
The deba (single-bevel, 165–210mm) is specifically designed for breaking down whole fish. The hon-deba has a thicker spine for bone-chopping; the mioroshi-deba is thinner for filleting in one tool.
The sujihiki (240–300mm) is a slicing knife for roasts and proteins. It’s narrower and longer than a gyuto, designed for long, smooth slicing motions.
Knife Type
Best For
Blade Length
Skill Level
Single or Double Bevel
Gyuto
All-purpose, proteins, vegetables
210–270mm
Beginner+
Double
Santoku
Vegetables, precise work, home kitchens
165–180mm
Beginner+
Double
Nakiri
Vegetable prep specialist
165–180mm
Intermediate+
Double
Yanagiba
Sashimi, raw fish
270–330mm
Advanced
Single
Deba
Breaking down whole fish
165–210mm
Intermediate+
Single
Sujihiki
Slicing roasts, proteins
240–300mm
Intermediate+
Double
Key Takeaway: Start with a 210mm gyuto. Add a santoku only if you do high-volume vegetable prep. Single-bevel knives (yanagiba, deba) require different sharpening technique – don’t buy them until you’re comfortable with whetstones.
Steel Types: What Matters Most for Sharpness and Maintenance?
This is where most buyers get lost. Steel choice determines edge retention, rust risk, and maintenance burden.
VG-10 stainless steel, hardened to approximately HRC 60–61, is the dominant entry-level Japanese professional steel, offering low maintenance and broad availability. It’s used in many mass-market Japanese knives. You’ll spend $80–$200 for a gyuto. VG-10 resists rust well enough for home kitchens, and you can hand-wash it without paranoia. The tradeoff: it doesn’t hold an edge quite as long as premium steels.
SG2 (also called R2) powder steel is a premium stainless option with ultra-fine carbide distribution that allows a keener, longer-lasting edge than conventional stainless steels like VG-10. Under heavy daily use, SG2 holds a working edge roughly 30–40% longer, justifying a ~$100–$150 price premium. You’ll find it in premium knives ($200–$450).
Shirogami (White Steel) #1 and #2 are highly reactive high-carbon steels capable of extreme sharpness, used in professional Japanese kitchens. Shirogami #1 contains 1.25–1.35% carbon and is one of the purest carbon steels available. It takes an exceptionally keen edge but rusts quickly if not dried and oiled after each use. Professional sushi chefs use these; home cooks rarely do.
Aogami Super (Blue Super Steel) adds tungsten and chromium to a high-carbon base, increasing hardness (HRC 65–67) and wear resistance while retaining excellent sharpenability. It’s reactive (carbon steel) – still requires rust prevention despite added chromium. You’ll find it in premium knives ($200–$600).
The budget math changes everything. A $150 gyuto with VG-10 steel plus a $40 whetstone plus a $15 strop ($205 total setup) provides better practical performance value than a $600 knife purchased without maintenance tools.
Key Takeaway: VG-10 ($80–$200) is the entry point – low maintenance, good edge retention. SG2 ($200–$450) holds edges 30–40% longer. Carbon steels (Shirogami, Aogami Super) require daily oiling but deliver exceptional sharpness for professionals.
Top Japanese Knife Brands and What They Cost in 2026
Here’s the brand tier breakdown with verified 2026 pricing.
Shun Classic uses VG-10 steel and retails $100–$200 for gyuto/chef knife styles. The 8-inch chef’s knife runs ~$160–$180. Shun is mass-market professional – widely available, reliable, low maintenance.
Global uses CROMOVA 18 steel (a proprietary 18% chromium stainless) and retails $80–$180. The seamless one-piece construction and hollow handles filled with sand for balance are iconic. Global’s HRC 56–58 is lower than most Japanese knives in this guide – more German-range hardness in a Japanese form factor.
MAC Professional uses molybdenum-vanadium steel and retails $90–$200. The MTH-80 (8-inch) runs ~$155–$175. MAC is a restaurant workhorse – thin grind, lightweight balance, significantly lighter than German alternatives.
Miyabi combines a SG2 powder steel core with German manufacturing precision (~$150–$350). The result is a knife with exceptional edge retention and a beautiful layered Damascus finish. It’s a premium German-Japanese hybrid suitable for home and professional users.
Masamoto uses white steel (Shirogami) and blue steel (Aogami) and is considered top-tier for professional sushi and traditional Japanese cuisine. Knives retail ~$200–$600. Masamoto is one of Japan’s most respected knife makers, producing blades used by professional sushi chefs.
Sakai Takayuki produces handmade and semi-handmade knives with Damascus and single-material options (~$150–$500). Sakai-region craftsmen hand-finish each blade. It represents the artisan tier below honyaki custom production.
The performance gap between a $160 knife and a $280 knife is narrower than the price gap for most home cooks. A well-made VG-10 knife competes at its price point. Higher-tier options offer a noticeably thinner grind and superior fit and finish, but the difference matters most to experienced users.
Key Takeaway: Entry-level options ($80–$200, stainless, low maintenance) → Premium options ($150–$500, SG2/Damascus) → Professional options ($200–$600, white/blue carbon steel, professional kitchens). Choose based on maintenance tolerance and use case, not brand prestige.
How Do You Choose the Right Japanese Knife for Your Skill Level?
Your experience determines which knife will actually work for you.
Beginner path: Start with a stainless clad, double-bevel, 210mm gyuto in the $100–$150 range. VG-10 stainless is your friend – low maintenance, forgiving, no rust paranoia. Pair it with a 1000-grit whetstone ($25–$40) and learn the basics. A quality entry-level option or MAC MTH-80 fits here perfectly.
Intermediate path: You’re comfortable with whetstones and want better edge retention. Move to SG2 or blue steel in the $200–$350 range. These hold edges longer under heavy use. You’ll sharpen every 3–6 months instead of every 2–4. A premium option or artisan Damascus knife fits here.
Professional/advanced path: You’re sharpening weekly, you understand ura-oshi (back-side maintenance for single-bevel knives), and you’re willing to oil carbon steel daily. White steel (Shirogami) or Aogami Super ($300+) delivers exceptional sharpness. Professional-grade options fit here.
Handle style matters. Wa (Japanese octagonal/D-shaped) handles shift balance toward the blade and reduce overall weight. Yo (Western) handles with bolsters add weight and stability preferred by cooks transitioning from German knives. If you’re new to Japanese knives, Yo handles feel more familiar.
The one-knife rule: Invest most of your budget in one primary knife. A $150 gyuto + $40 whetstone + $15 strop ($205 total setup) beats a $600 knife with no maintenance investment.
Key Takeaway: Beginners: VG-10 stainless, $100–$150, Yo handle. Intermediate: SG2 steel, $200–$350, either handle. Advanced: Carbon steel, $300+, Wa handle. Always prioritize one excellent knife over multiple mediocre ones.
How to Maintain and Sharpen Professional Japanese Knives
This is where most people fail. Maintenance separates a $150 knife that lasts 20 years from a $600 knife that chips in six months.
Whetstone progression is the correct path. Start at 400 grit for repair or reprofiling damaged edges. Move to 1000 grit for primary sharpening. Refine at 3000 grit. Finish at 6000+ grit for a polished edge. A standard progression for sharpening Japanese knives is to start at 400–800 grit for damaged edges, move to 1000 for primary bevel work, then 3000 for refinement, and finish at 6000 or higher for a polished edge.
Never use a grooved honing steel. Grooved honing steels cause micro-fracture and chipping in high-hardness Japanese blades (HRC 60+) due to the brittle carbide structure. Use a ceramic rod or leather strop for daily edge maintenance instead.
Storage matters. Use a magnetic strip or knife block – never loose in a drawer. Loose storage causes edge damage and safety hazards.
Cleaning is non-negotiable. Hand wash only. Dry immediately. No dishwasher. Prolonged moisture causes corrosion even on stainless knives, and will loosen or crack wa handles.
Sharpening frequency: Touch up every 2–4 weeks of regular use with a ceramic rod or strop. Full sharpen every 3–6 months. Professional sharpening services typically charge $10–$25 per knife depending on blade length and condition, with discounts for multiple knives.
For single-bevel knives (yanagiba, deba), the process is different. Single-bevel knives require sharpening on the front face only, with the back (ura) maintained flat using a technique called ura-oshi. Incorrect back-side sharpening will permanently alter the geometry.
Key Takeaway: Whetstone progression: 400→1000→3000→6000+ grit. Never use grooved honing steel. Hand wash, dry immediately. Touch up every 2–4 weeks; full sharpen every 3–6 months. Professional sharpening: $10–$25 per knife.
Frequently Asked Questions About Professional Japanese Knives
How much should you spend on a professional Japanese kitchen knife?
Direct Answer: Start with $100–$150 for a quality VG-10 gyuto. Add $40 for a whetstone and $15 for a strop. Total: $205. This setup outperforms a $600 knife with no maintenance tools.
The biggest mistake new Japanese knife buyers make is spending $500 on a knife and then having nothing to maintain it with. A $150 knife with a proper whetstone setup will outperform an expensive knife sharpened on a pull-through sharpener. Budget for maintenance tools – they’re not optional.
Are Japanese knives better than German knives for professional kitchens?
Direct Answer: Japanese knives are better for high-volume, repetitive cutting where edge retention matters. German knives are better for abuse tolerance and forgiving technique.
Japanese knives are typically hardened to between 60 and 67 HRC, compared to 56–58 HRC for most German knives, enabling a much thinner, more acute edge geometry. This means longer edge retention but less toughness. Professional sushi kitchens use Japanese knives. Butcher shops use German knives. Choose based on your cutting style, not prestige.
Can beginners use professional Japanese knives safely?
Direct Answer: Yes, but only if you start with stainless clad, double-bevel knives (VG-10 steel) and learn proper technique before advancing to carbon steel or single-bevel designs.
Japanese knives are designed for push-pull cutting and slicing motions. Cooks who use the rocking chop common with German knives risk chipping the more brittle Japanese blade, especially near the tip. Take 30 minutes to learn the cutting motion. Watch a video. Practice on vegetables first.
What is the difference between a gyuto and a santoku?
Direct Answer: A gyuto (210–270mm) is the Japanese chef’s knife – all-purpose, works for proteins and vegetables. A santoku (165–180mm) is shorter, with a flat edge, better for precise vegetable work and home kitchens.
The gyuto is more versatile. The santoku is easier to control. If you only buy one knife, buy a gyuto. If you do high-volume vegetable prep, add a santoku.
Do Japanese kitchen knives rust easily?
Direct Answer: VG-10 and SG2 stainless steels resist rust well. Carbon steels (Shirogami, Aogami Super) rust quickly if not dried and oiled after each use.
Shirogami #1 contains 1.25–1.35% carbon and is one of the purest carbon steels available. It takes an exceptionally keen edge but rusts quickly if not dried and oiled after each use. If you’re not willing to oil your knife daily, stick with stainless clad options.
How often do professional Japanese knives need sharpening?
Direct Answer: Touch up every 2–4 weeks with a ceramic rod or strop. Full sharpen every 3–6 months with a whetstone. Professional sharpening services cost $10–$25 per knife.
Frequency depends on use volume and cutting surface. Cutting on wood is gentler than cutting on plastic. High-volume kitchens sharpen more often. Home cooks sharpen less frequently.
Is a single-bevel or double-bevel knife better for home cooks?
Direct Answer: Double-bevel knives (gyuto, santoku, nakiri) are better for home cooks. Single-bevel knives (yanagiba, deba) require different sharpening technique and are designed for professionals.
Single-bevel knives require sharpening on the front face only, with the back (ura) maintained flat using a technique called ura-oshi. This is a skill that takes practice. Start with double-bevel. Add single-bevel knives only after you’re comfortable with whetstones.
Conclusion
Professional Japanese kitchen knives aren’t mystical objects. They’re engineered tools optimized for edge retention over toughness, requiring technique modification and consistent maintenance.
Start with a 210mm VG-10 gyuto in the $100–$150 range. Add a 1000-grit whetstone and a ceramic strop. Learn the push-pull cutting motion. Sharpen every 3–6 months. Hand wash and dry immediately.
If you’re upgrading from German knives, expect a learning curve. The thinner edge geometry demands different technique. But once you adapt, you’ll notice the difference: longer edge retention, finer cuts, and a tool that rewards precision.
Some knives are built to blend in. This week’s Weekly Edge feature is not one of them.
We’re spotlighting Hogue — a respected American knife maker known for precision, quality materials, and knives that feel purpose-built from the moment you pick them up.
Leading this week’s lineup is a Hogue knife with one standout detail collectors will notice right away: a bayonet-style blade.
That blade profile gives the knife a bold, military-inspired look that feels clean, symmetrical, and unmistakably distinctive. It’s the kind of design that appeals to collectors, military history fans, tactical knife enthusiasts, and anyone who appreciates a knife with a little more presence.
But this Hogue feature is not just about looks. Hogue’s reputation for fit, function, and American-made craftsmanship gives this knife real substance behind the style.
Why We Like This Week’s Hogue Feature
Distinctive bayonet-style blade profile
Strong collector appeal
Military-inspired design character
American-made Hogue craftsmanship
Great fit for gear fans and military-related collections
Featured in this week’s Weekly Edge
And because this is The Weekly Edge, Knife Depot members get an exclusive offer:
Members save $10 on all featured Hogue knives in the collection.
If your collection could use something with a little more history, edge, and attitude, this week’s Hogue lineup is worth a closer look.
Deployment speed is the decisive criterion – assisted-opening folders deploy in under 0.5 seconds, making them practically equivalent to fixed blades in most encounters
Blade length 2.5–3.5 inches hits the legal sweet spot across most U.S. jurisdictions while remaining tactically viable
Budget picks ($30–$60) use 8Cr13MoV steel; mid-range ($60–$120) jumps to S30V; premium ($120–$250) adds refined ergonomics and materials
Introduction
Based on our analysis of manufacturer specifications, state knife law databases, and defensive training community standards collected through 2026, we’ve identified the criteria that separate a genuinely useful self-defense EDC knife from gear-collector fantasy.
Here’s what most guides miss: they treat EDC self-defense knives like collectibles, listing specs without addressing the legal minefield or the physics of stress-induced motor skill degradation. You’re not buying a knife to admire – you’re buying a tool for a scenario you hope never happens, and that changes everything.
This guide covers seven specific knife recommendations across three price tiers, a state-by-state legality breakdown, and a decision framework to help you self-qualify rather than guess. We’ll also address the uncomfortable truth: carrying a knife for self-defense creates legal exposure that most carriers don’t understand.
What Makes a Knife Good for EDC Self Defense?
Deployment speed is the primary criterion. In a defensive scenario, a knife that takes three seconds to open is nearly useless. Assisted openers and flippers give you the fastest deployment of any folding knife – and that matters more than blade steel or handle material.
Here’s why: under adrenaline, your fine motor skills degrade dramatically. Research from defensive training communities shows that gross motor movements (like pulling a flipper tab) are far more reliable than fine pinch actions (like manipulating a thumb stud). If you can’t reliably open your knife under stress, it’s a paperweight.
Blade length is your second constraint – and it’s legal, not tactical. According to AKTI’s state-by-state database, a blade between 2 and 3.5 inches is both legally defensible in most U.S. jurisdictions and long enough for effective defensive use. Shorter blades (under 2 inches) are legal almost everywhere but sacrifice reach. Longer blades (over 4 inches) exceed limits in major cities like Los Angeles, Chicago, and New York.
One-hand opening mechanisms come in three flavors:
Thumb studs: Reliable in calm conditions, unreliable under stress (fine motor skill problem)
Flippers: Gross motor movement, faster deployment, legal in most states
Assisted openers: Spring-assisted deployment, fastest option, legal status varies by state (more on this below)
Fixed vs. folding is a tradeoff. Fixed blades have zero deployment time – you draw and use in one motion. But they’re harder to conceal, require a sheath, and carry legal/social stigma as “fighting knives.” Folding knives are more practical for true EDC (pocket carry, less conspicuous), but add a half-second opening delay.
For most readers, a quality folding knife with a flipper or assisted opener is the practical choice. If your jurisdiction allows it and you’re comfortable with a sheath carry, a micro fixed blade (under 2.5 inches) eliminates deployment time entirely.
Key Takeaway: Deployment speed beats blade steel. A 2.75-inch assisted opener you can deploy in 0.4 seconds is more useful than a 4-inch fixed blade you can’t legally carry in your city.
How Do Self Defense EDC Knives Differ from Tactical or Hunting Knives?
Direct answer: EDC self-defense knives prioritize concealability and one-hand deployment over cutting performance. Tactical and hunting knives optimize for different scenarios.
Here’s the distinction:
Feature
EDC Self-Defense
Tactical Folder
Hunting Knife
Blade length
2.5–3.5 inches
3.5–4.5 inches
3–4 inches
Weight
2–4 oz
4–6 oz
4–8 oz
Opening mechanism
Flipper/assisted
Thumb stud/flipper
Manual/thumb stud
Carry method
Pocket clip (deep carry)
Pocket clip (visible)
Belt sheath or pack
Primary use
Defensive deployment speed
Utility + defensive capability
Field dressing, camp tasks
Legal concern
High (carry restrictions)
Medium (blade length)
Low (hunting context)
The weight difference matters for all-day carry. Spyderco’s Para 3 weighs 3.4 oz with a 2.95-inch blade – light enough that you forget it’s in your pocket. Compare that to CRKT’s Pilar at 2.6 oz, or a tactical folder like Cold Steel’s Recon 1 at 4.5 oz. That extra ounce matters after eight hours.
Tactical knives prioritize versatility – they’re designed to handle utility tasks (opening packages, cutting rope) and defensive scenarios. Hunting knives are optimized for field dressing game and camp work. Self-defense EDC knives are optimized for one thing: being deployed quickly from a pocket without drawing attention.
The legal distinction is critical. A 3.5-inch tactical folder in a visible pocket clip reads as “tactical gear” to law enforcement. A 2.75-inch EDC knife in a deep-carry clip reads as a utility tool. That perception difference can affect how your carry is interpreted if you’re ever involved in an incident.
Key Takeaway: EDC self-defense knives are lighter (2–4 oz), shorter (2.5–3.5 inches), and faster-deploying than tactical or hunting knives. They’re optimized for concealment and stress deployment, not utility or field work.
Top 7 Best EDC Knives for Self Defense in 2026
Here’s a quick comparison of our picks:
Knife
Blade Length
Steel
Weight
Opening
Price Tier
Best For
Kershaw Cryo
2.75″
8Cr13MoV
4.0 oz
SpeedSafe
Budget
First-time buyers
CRKT Pilar
2.4″
8Cr13MoV
2.6 oz
Manual
Budget
Lightweight carry
Kershaw Link
3.25″
420HC
3.2 oz
SpeedSafe
Mid-range
Legal sweet spot
Spyderco Para 3
2.95″
S30V
3.4 oz
Manual
Mid-range
Premium steel on budget
Benchmade Bugout
3.24″
S30V
1.85 oz
Thumb stud
Premium
Ultralight EDC
Cold Steel Recon 1
4.0″
AUS-8A
4.8 oz
Thumb stud
Mid-range
Larger hands
ESEE Candiru
2.25″
1075 carbon
1.3 oz
Fixed blade
Budget
Zero deployment time
Best Budget Pick: Under $60
The Kershaw Cryo is the entry point that doesn’t feel like a compromise. At $35–$40 MSRP, it features a 2.75-inch 8Cr13MoV blade with SpeedSafe assisted opening – meaning you get deployment speed without paying for premium steel.
8Cr13MoV is budget-tier steel, but here’s the reality: it holds an edge well enough for self-defense scenarios (you’re not cutting rope for hours). It requires more frequent sharpening than S30V, but a $15 sharpener handles it fine. The SpeedSafe mechanism is reliable – Kershaw’s been refining it for 20+ years.
At 4.0 oz, it’s heavier than premium picks, but that weight comes from a robust build. The titanium carbo-nitride coating adds durability. If you’re testing whether EDC carry is right for you, start here.
Pros: Affordable, proven mechanism, legal blade length in most jurisdictions Cons: Heavier than premium options, 8Cr13MoV requires more maintenance
Best Mid-Range Pick: $60–$120
The Spyderco Para 3 at $130–$145 MSRP is the knife that converts budget-conscious buyers into enthusiasts. You get CPM S30V steel – a significant jump in edge retention – at a price point that doesn’t require justifying to your spouse.
The 2.95-inch blade hits the legal sweet spot. The compression lock is reliable, though it requires two-handed closing (relevant if you need to re-holster quickly). At 3.4 oz, it’s light enough for all-day carry but substantial enough to feel like a real tool.
S30V holds an edge 3–4x longer than 8Cr13MoV in cutting tests. That matters if you ever need to use it – you want a sharp blade, not a dull one. The trade-off: S30V is harder to sharpen without proper equipment.
The Benchmade Bugout at $155–$160 MSRP is the ultralight option. At just 1.85 oz with a 3.24-inch S30V blade, it’s the knife you’ll actually carry because you forget it’s there.
The AXIS lock is Benchmade’s proprietary design – reliable and fast to deploy with a thumb stud. The blade geometry is optimized for slicing rather than stabbing (relevant for self-defense legality – prosecutors scrutinize blade shape). G10 handle scales provide grip without adding weight.
This is the knife for people who’ve already decided EDC carry is part of their life. It’s not the best value – you’re paying for weight savings and brand reputation. But if you’re carrying daily for years, that ounce of weight difference adds up.
Pros: Ultralight, premium steel, proven lock mechanism, excellent resale value Cons: Higher price, thumb stud deployment (fine motor skill dependency)
Best Fixed-Blade EDC Option
The ESEE Candiru at $40–$50 MSRP is the fixed-blade option that actually fits in an EDC loadout. At 2.25 inches and 1.3 oz, it’s designed for neck or boot carry – not pocket carry.
1075 high-carbon steel is softer than stainless options, meaning it requires maintenance (you’ll need to oil it to prevent rust). But it’s easier to sharpen and holds an edge well. The fixed blade eliminates deployment time entirely – you draw and use in one motion.
This is the pick for readers in permissive jurisdictions (Texas, Florida) or those comfortable with a neck knife under a shirt. It’s not a pocket knife, so it changes your carry method entirely.
Pros: Zero deployment time, easy to sharpen, legal in most jurisdictions, affordable Cons: Requires maintenance, sheath carry is less concealable, not pocket-friendly
Best for One-Handed Deployment
The Kershaw Link at $50 MSRP combines assisted opening with a 3.25-inch blade – hitting the legal sweet spot while prioritizing deployment speed. SpeedSafe assisted opening means you get sub-0.5-second deployment with one hand.
420HC steel is mid-tier – better edge retention than 8Cr13MoV, inferior to S30V. At this price point, it’s a solid compromise. The blade length is legal in most states but exceeds limits in some municipalities (verify locally).
This is the pick if deployment speed is your primary concern and you’re willing to accept mid-tier steel.
Pros: Fast assisted opening, legal blade length in most jurisdictions, affordable Cons: 420HC requires periodic sharpening, blade length exceeds some city limits
Best Compact / Deep-Carry Option
The CRKT Pilar at $40 MSRP is the lightest folding option at 2.6 oz with a 2.4-inch blade. It’s designed for deep carry – the pocket clip sits low, making it nearly invisible in a pocket.
2.4 inches is short enough to be legal everywhere, but that sacrifices reach. Manual opening (no assisted mechanism) means you need both hands to deploy. This is a tradeoff: maximum concealability for slower deployment.
Pick this if you’re in a restrictive jurisdiction (California, New York) or prioritize invisibility over speed.
The Benchmade Freek at $165 MSRP combines assisted opening with a larger 3.6-inch S30V blade. The AXIS lock with thumb stud gives you reliable deployment.
3.6 inches exceeds limits in some municipalities – verify your local laws before purchasing. But in permissive jurisdictions, it’s the assisted opener that doesn’t compromise on blade length.
Pros: Assisted opening, premium steel, larger blade for reach Cons: Blade length exceeds some city limits, higher price
Key Takeaway: Budget picks ($35–$50) use assisted opening with 8Cr13MoV steel and 2.75–3.25-inch blades. Mid-range ($60–$145) adds S30V steel and refined ergonomics. Premium ($155–$250) prioritizes weight savings and brand reputation.
Are EDC Self Defense Knives Legal to Carry?
Direct answer: Legality varies dramatically by state and municipality. Blade length limits are the most common restriction, but assisted-opening and automatic knives face additional scrutiny in some jurisdictions.
This is the section that separates informed carriers from people who’ll face criminal charges.
State-by-State Blade Length Limits
State/City
Concealed Blade Limit
Open Carry Limit
Assisted Openers
Notes
Texas
No limit
No limit
Legal
Most permissive state
California
2.5″ (varies by city)
3″ (varies)
Gray area
LA stricter than state law
New York
4″ (state)
4″
Restricted
NYC has additional limits; gravity knife law enforced
California Penal Code §21510 prohibits carrying a switchblade with a blade 2 inches or longer. But here’s where it gets complicated: many municipalities add stricter limits on folding knives carried concealed. Los Angeles Municipal Code §55.10 restricts concealed knives to blades under 3 inches – stricter than state law.
If you live in California, verify your specific city’s ordinance. State law and city law don’t always align.
New York’s Gravity Knife Enforcement
AKTI tracked New York’s gravity knife law amendment in 2019, but enforcement patterns remain aggressive. NYPD has continued prosecuting one-handed folding knives that open with centrifugal force, even though the legal definition changed.
If you carry in New York, assume assisted openers and flippers are legally risky. Stick to manual openers or fixed blades under 2 inches.
Assisted-Opening Legal Status
According to AKTI’s switchblade law tracking, most states treat assisted-opening knives as legal folding knives. However, California’s definition of “switchblade” has been applied to some assisted openers, creating legal gray areas. Hawaii and some other states have similar ambiguity.
If you’re in a restrictive state, contact a local knife attorney before purchasing an assisted opener. The $40 knife isn’t worth a misdemeanor charge.
The Legal Reality of Knife Self-Defense
Here’s the uncomfortable part: justifiable knife use requires that you reasonably believed you faced imminent serious bodily harm or death, and that deadly force was your last reasonable option.
In duty-to-retreat states (most of the Northeast and Midwest), you’re legally required to retreat if you can do so safely. Using a knife when retreat was possible can result in criminal charges even if you were technically attacked.
Carrying a knife for self-defense creates legal exposure. Understand your state’s use-of-force laws before you carry.
Key Takeaway: Blade length 2.5–3.5 inches is legal in most U.S. jurisdictions. Assisted openers are legal in most states but restricted in California, New York, and Hawaii. Always verify local laws before purchase – a $40 knife isn’t worth a misdemeanor.
How to Choose the Right Self Defense EDC Knife for Your Needs
Here’s a five-step framework to self-qualify:
Step 1: Check your local blade length laws. Use AKTI’s state-by-state database to find your state’s limit. If you’re in a major city, check the municipal ordinance – it’s often stricter than state law. Write down your legal maximum blade length.
Step 2: Decide between fixed and folding. Fixed blades have zero deployment time but require a sheath and are harder to conceal. Folding knives are more practical for true EDC (pocket carry) but add a half-second opening delay. If you’re comfortable with a neck knife or boot knife, fixed blades are superior. If you want pocket carry, go folding.
Step 3: Select your opening mechanism.
Manual thumb stud: Reliable in calm conditions, unreliable under stress (fine motor skill degradation)
Flipper: Gross motor movement, faster deployment, legal in most states
Assisted opener: Spring-assisted, fastest option, legal status varies by state
If deployment speed is your priority and your state allows it, assisted opening wins. If you’re in a restrictive state, flipper tabs are your best compromise.
Mid-range ($60–$120): S30V or S35VN – significantly better edge retention, harder to sharpen
Premium ($120–$250): S30V with refined ergonomics and materials
CPM-S30V holds a sharp edge far longer than 8Cr13MoV in controlled cutting tests, though it’s harder to resharpen without proper tools.
Step 5: Test grip and pocket clip in-store or review return policies online. A knife that doesn’t fit your hand or pocket is a knife you won’t carry. If you’re buying online, verify the retailer’s return policy. Knife Depot offers hassle-free returns on most EDC knives – test before committing.
Key Takeaway: Verify local blade length limits → choose fixed or folding → select opening mechanism based on legality → match steel to budget → test fit before committing.
FAQ: Best EDC Knives for Self Defense
What is the best blade length for an EDC self defense knife?
Direct Answer: 2.5–3.5 inches is the legal and tactical sweet spot for most U.S. jurisdictions.
Shorter blades (under 2 inches) are legal almost everywhere but sacrifice reach. Longer blades (over 4 inches) exceed limits in major cities. The 2.5–3.5 inch range is legal in most states while remaining long enough for effective defensive use. According to AKTI’s state-by-state database, this range covers the majority of permissive jurisdictions.
Is a fixed blade or folding knife better for self defense?
Direct Answer: Fixed blades have zero deployment time; folding knives are more practical for true EDC carry.
Fixed blades can be drawn and used in a single motion – there’s no opening step. But they require a sheath, are harder to conceal, and carry legal/social stigma as “fighting knives.” Folding knives are more practical for pocket carry (less conspicuous) but add a half-second opening delay. For most readers, a quality folding knife with a flipper or assisted opener is the practical choice.
How much should I spend on a self defense EDC knife?
Direct Answer: $40–$60 for a reliable budget option; $100–$150 for premium steel; $150+ for ultralight options.
The Kershaw Cryo at $35–$40 is a solid entry point with assisted opening. The Spyderco Para 3 at $130–$145 adds premium S30V steel. The Benchmade Bugout at $155–$160 prioritizes weight savings. Don’t overspend on your first EDC knife – test the category before investing $200+.
Are assisted-opening knives legal for everyday carry?
Direct Answer: Assisted-opening knives are legal in most U.S. states but restricted or banned in California, New York, Hawaii, and a few others.
According to AKTI’s switchblade law tracking, most states treat assisted-opening knives as legal folding knives. However, California’s definition of “switchblade” has been applied to some assisted openers, creating legal gray areas. If you’re in a restrictive state, contact a local knife attorney before purchasing an assisted opener.
What blade steel is best for a self defense EDC knife?
Direct Answer: S30V or S35VN for premium edge retention; 8Cr13MoV or 420HC for budget options.
CPM-S30V holds a sharp edge far longer than 8Cr13MoV in controlled cutting tests. The trade-off: S30V is harder to resharpen without proper equipment. For self-defense scenarios, a sharp blade matters – you want edge retention that lasts through a defensive encounter.
Can a pocket knife actually be used effectively for self defense?
Direct Answer: Yes, but only in imminent threat scenarios where retreat isn’t possible and proportional force is justified.
Justifiable knife use requires that you reasonably believed you faced imminent serious bodily harm or death, and that deadly force was your last reasonable option. A pocket knife is a last-resort tool, not a primary defense strategy. Training matters – carrying without understanding use-of-force law creates legal exposure.
What features should I avoid in a self defense EDC knife?
Direct Answer: Avoid manual thumb studs (unreliable under stress), blades exceeding your local legal limit, and knives with serrated edges (harder to control, more likely to cause severe injury).
Under adrenaline, fine motor skills degrade – thumb studs become unreliable. Flippers and assisted openers use gross motor movements, which are more reliable under stress. Serrated edges are harder to control and more likely to cause severe injury, which complicates the legal justification for self-defense use. Stick to plain-edge blades in your local legal limit.
Conclusion
Choosing an EDC self-defense knife isn’t about specs – it’s about understanding the legal framework, the physics of stress deployment, and your actual carry habits.
Start with the Kershaw Cryo at $35–$40 if you’re testing the category. Move to the Spyderco Para 3 at $130–$145 if you’re committed to daily carry. Invest in the Benchmale Bugout at $155–$160 if weight matters after months of carry.
But before you buy, verify your local blade length limits, understand your state’s use-of-force laws, and accept that carrying a knife for self-defense creates legal exposure. A knife is a last-resort tool, not a primary defense strategy.
Knife Depot carries all the knives mentioned in this guide with hassle-free returns – test before committing to daily carry.
Upgrade Your Everyday Carry
Built for performance. Designed to stand out. Shop knives ready for everyday carry, the outdoors, or your collection.
TL;DR: – Entry-level custom knives run $200–$450; mid-tier ABS Journeyman Smith damascus pieces cost $800–$2,750; investment-grade Master Smith integrals reach $4,000–$12,000+
ABS Master Smith designation (fewer than 130 smiths worldwide) is the most meaningful credential for collectors evaluating quality
Commission deposits typically run 25–50% with 3–18 month timelines; red flags include no verifiable portfolio, full upfront payment, and generic stock photos
Store pieces at 45–55% relative humidity to prevent cracking in natural handle materials; provenance documentation materially increases resale value
What Are Custom Handmade Collector Knives?
Custom handmade collector knives are one-of-a-kind or limited-edition blades forged or ground by individual artisans rather than mass-produced in factories. (Fws.gov) Unlike production knives, each piece carries the maker’s signature aesthetic, material choices, and craftsmanship philosophy – making them functional art objects as much as cutting tools.
The collector appeal is straightforward: uniqueness, documented provenance, and the potential for value appreciation over time. Interest in custom knives has grown significantly in recent years, reflecting a surge in collector demand. You’re not just buying a blade; you’re acquiring a piece of the maker’s artistic vision and technical skill.
Custom collector knives typically fall into three categories. Utility art knives blend functional performance with aesthetic refinement – think a damascus drop point that cuts as well as it looks. Display pieces prioritize visual impact: integrals with mammoth ivory scales, hamons (temper lines) in W2 steel, or elaborate handle inlays. Investment-grade blades are pieces by established or deceased master smiths that command premium prices at auction and often appreciate over time.
The distinction from production knives matters here. Most people agree that factory knives simply can’t be compared to well made fine custom knives by established knife makers. Production knives offer consistency and accessibility; custom pieces offer soul and scarcity.
Key Takeaway: Custom handmade collector knives are one-of-a-kind artisan pieces valued for uniqueness, documented maker credentials, and potential value appreciation – fundamentally different from factory-produced alternatives.
How Much Do Custom Handmade Collector Knives Cost?
Price is the first question collectors ask, and the answer depends entirely on three factors: maker credential tier, steel type, and handle material. Let’s break this down with real numbers.
Entry-Level Custom Knives ($200–$450)
Emerging makers building their portfolios typically work in stock-removal (grinding pre-made steel blanks rather than forging). Prices range from $120 to $400+ depending on materials, maker, and rarity. A hand-ground CPM-154 drop point with G10 handle from an emerging maker sits comfortably in the $200–$450 range. You’re paying for skill and time, not yet for reputation. Notably, the market has shifted toward premium, accessible steels like S90V, which is beginning to appear in entry-level custom work as material costs normalize.
Mid-Tier Custom Knives ($800–$2,750)
This is where ABS Journeyman Smiths operate. These makers have submitted five knives for formal judging and demonstrated documented smithing experience. A mid-tier damascus fixed blade with stabilized burl handle represents the sweet spot for many collectors: materials cost roughly $200–$350, plus 20–30 hours of skilled labor at $50–$80/hour. That math yields a realistic asking price of $1,200–$2,750 depending on the maker’s reputation and the complexity of the damascus pattern.
Investment-Grade Custom Knives ($4,000–$12,000+)
ABS Master Smiths command premium prices. These are the fewer than 130 smiths worldwide who’ve passed the rigorous two-phase performance test – cutting rope, shaving arm hair, and bending the blade 90 degrees without fracture. Investment-grade knives – ABS Master Smith integrals with mammoth ivory scales – regularly sell at auction for $4,000–$12,000+. An integral (blade and handle forged from a single piece of steel) with premium handle materials can easily exceed $8,000.
Tier
Maker Level
Price Range
Materials
Labor Hours
Typical Steel
Entry
Emerging/Stock-Removal
$200–$450
$50–$100
8–15
CPM-154, AUS-8A
Mid
ABS Journeyman Smith
$800–$2,750
$200–$350
20–30
Damascus, W2
High
ABS Master Smith
$4,000–$12,000+
$400–$800
40–80+
Damascus, W2, Exotic
The cost drivers are transparent once you understand them. Damascus pattern-welded steel commands a premium because each billet is unique and the forge-welding process demands significant skill. Natural handle materials – bone, stag, stabilized wood – cost more than synthetics but add collector appeal. Mammoth ivory, legal for commercial trade in the US with proper documentation, can add $500–$2,000+ to a piece’s value.
Key Takeaway: Entry-level custom knives cost $200–$450; mid-tier ABS Journeyman Smith damascus pieces run $800–$2,750; Master Smith integrals reach $4,000–$12,000+. Material and labor transparency explains the price tiers.
What Makes a Custom Knife Worth Collecting?
Not every handmade knife is collectible. The difference between a decorative piece and a true collector’s knife comes down to five quality indicators: fit and finish, grind consistency, handle geometry, maker credentials, and provenance.
Fit and Finish
Examine the blade-to-handle junction. Are there gaps? Does the handle sit flush against the blade? Professional custom makers spend hours perfecting this interface. The blade should have no visible grinding marks (unless intentional, like a satin finish), and the edge should be sharp enough to shave arm hair without pressure – a standard test among collectors.
Grind Consistency
Run your finger along the blade’s spine. A quality grind maintains consistent thickness from ricasso (the unsharpened section near the handle) to tip. Inconsistent grinds suggest rushed work or poor heat treatment. For damascus blades, the pattern should be crisp and well-defined, not blurred or uneven. The composition, structure, and behavior of steel under stress are what ultimately separate a blade that holds an edge from one that fails – a principle that applies directly to evaluating grind quality and heat treatment consistency in custom work.
Handle Geometry
The handle should feel intentional. Finger choils (the curved indentation where your index finger rests) should be ergonomic, not afterthoughts. Scales should be symmetrical, and any inlays or decorative elements should be flush and secure. Poor handle geometry signals a maker who prioritizes aesthetics over function.
Maker Credentials
This is where ABS credentials matter most. High-performance steels like VG10, Damascus, ATS34, and Wootz steel offer durability, edge retention, and stunning patterns. But the maker’s ability to work these steels consistently is what separates collectible from decorative. An ABS Journeyman Smith has proven competency through formal judging; a Master Smith has passed a performance test that most makers never attempt.
Provenance Documentation
This is the gap most collectors overlook. A signed receipt specifying steel type, handle material, and build date – plus high-resolution photographs – materially increases resale value. Auction houses require this documentation for high-value lots. Without it, even a beautiful knife is harder to authenticate and resell.
Blade Steel Types and Their Collector Appeal
Damascus pattern-welded steel dominates collector preferences for aesthetic reasons. Each billet produces unique layered patterns that acid-etching reveals. The visual character – combined with the skill required to forge-weld multiple steel layers without delamination – justifies the premium price. The composition and forge-welding techniques of pattern-welded steel can be traced and authenticated, lending additional scholarly weight to provenance claims on high-value damascus pieces.
W2 high-carbon steel appeals to collectors who value the hamon (temper line) that differential heat treatment produces. W2’s shallow hardening characteristics create dramatic hamons, making it a favorite for art knives. The downside: W2 requires consistent heat treatment skill and offers less corrosion resistance than stainless steels.
CPM-154 and similar high-alloy stainless steels offer superior corrosion resistance for display pieces but lack the visual character of hand-forged or pattern-welded steels. If you’re collecting for investment and display, damascus or W2 typically command higher resale premiums than stainless.
Handle Materials That Elevate Value
Synthetic materials (G10, Micarta) are durable and affordable – perfect for functional pieces. Natural materials (stag, bone, stabilized wood) add mid-premium value and aesthetic warmth. Exotic premium materials (mammoth ivory, mother of pearl) can add $500–$2,000+ to a piece’s value depending on quality and rarity.
A critical note: Mammoth ivory is not subject to CITES restrictions because the species is extinct and no longer at risk from trade; it is legal to buy, sell, and import/export with proper documentation of origin. However, some states impose additional restrictions beyond federal law, so verify your local regulations before purchasing.
Key Takeaway: Collectible custom knives demonstrate fit and finish excellence, consistent grinds, intentional handle geometry, documented maker credentials (ideally ABS Journeyman or Master Smith), and provenance documentation. Damascus and W2 steels command higher collector premiums than stainless.
How to Find and Vet Reputable Custom Knife Makers
Finding the right maker is half the battle. The sourcing channels are well-established, but vetting requires a systematic approach.
Primary Sourcing Channels
Blade Show Atlanta is the single largest annual event, attracting over 1,500 exhibitors and tens of thousands of collectors. You’ll find custom and art knife sections where sole-authorship pieces change hands directly. The Art Knife Invitational (AKI) is invitation-only and reserved for the highest tier of makers – it’s where the most significant collector transactions occur, though access requires established collector network connections.
Instagram has become a primary discovery channel. Many makers post work-in-progress photos and finished pieces directly to their accounts. BladeForums and AllAboutPocketKnives host active collector communities where you can ask for maker recommendations and read firsthand accounts of commissioning experiences.
Vetting Checklist
Before committing to a commission, verify these points:
Portfolio depth: Can the maker show you 20+ completed pieces with customer references? Generic stock photos are a red flag.
Wait list transparency: Established makers maintain public wait lists. If a maker won’t tell you the timeline, move on.
References from past buyers: Reach out to previous customers. Reputable makers encourage this.
Certification status: ABS Journeyman or Master Smith designation? Check the ABS directory to verify.
Written specification document: Before paying any deposit, you should have a contract specifying steel type, handle material, blade length, and build timeline.
Red Flags to Avoid
No verifiable past work. If a maker can’t show you completed pieces, they’re not established enough for a significant investment. Requesting full payment upfront with no contract is a major warning sign – standard practice is 25–50% deposit with the balance due upon completion. Generic stock photos instead of original work photographs suggest the maker is either new or dishonest about their capabilities. A structured evaluation framework helps collectors expose gaps in a maker’s credentials, coverage of past work, and operational transparency before committing any deposit.
The Commission Process
Standard timeline: 25–50% deposit to begin work, with total project timelines of 3–18 months depending on the maker’s waitlist. Established Master Smiths often have 12–18 month waits. Emerging makers might deliver in 3–6 months. Request a written specification document detailing every aspect of the knife before paying any deposit.
Key Takeaway: Source custom makers through Blade Show Atlanta, Instagram, and collector communities. Vet using a checklist: portfolio depth, wait list transparency, customer references, ABS credentials, and written specifications. Avoid makers with no verifiable work, full upfront payment demands, or generic photos.
Building Your Custom Knife Collection: A Step-by-Step Approach
Starting a collection is simpler than you think if you follow a structured roadmap.
Step 1: Define Your Focus
Decide what draws you. Are you collecting damascus art knives? Tactical fixed blades? Regional makers? Specific steel types? Your focus shapes every subsequent decision. A collector focused on W2 hamons will pursue different makers than someone collecting integral designs.
Step 2: Set a Realistic Budget
Determine how much you’re willing to spend annually. A modest collection might start with 1–3 pieces under $500 each. A serious collector might allocate $5,000–$10,000 annually. Budget matters because it determines which makers you can access – entry-level makers are more accessible than Master Smiths with year-long waits.
Step 3: Research Before Buying
Spend 2–3 months reading collector forums, following makers on Instagram, and attending shows. Talk to experienced collectors. Understand the market before you commit capital. This research phase prevents costly mistakes.
Step 4: Start Small, Scale Deliberately
Buy 1–3 pieces from emerging or mid-tier makers first. These pieces teach you what you actually value in a knife – handle feel, blade geometry, steel performance. Once you understand your preferences, commission higher-end work.
Step 5: Document and Store Properly
For each piece, maintain: original receipt, maker correspondence, high-resolution photographs (front, back, side, detail shots), and any certificates of authenticity. Store at 45–55% relative humidity to prevent cracking in natural handle materials. Display cases with UV-filtering glass protect against fading and material degradation. Apply Renaissance Wax to carbon steel blades every 6–12 months to prevent oxidation.
Portfolio-Building Tip
Start with 1–3 pieces under $500 before commissioning high-end work. This approach lets you build relationships with makers, understand the commissioning process, and refine your collecting focus without overcommitting capital.
Key Takeaway: Build your collection by defining focus, setting budget, researching thoroughly, starting with entry-level pieces, and documenting everything. Store at 45–55% RH with UV-filtering display cases and Renaissance Wax maintenance.
Custom Handmade vs Production Collector Knives: Key Differences
The choice between custom and production depends on your priorities. Here’s the honest comparison:
Factor
Custom Handmade
Production Collector
Uniqueness
One-of-a-kind or limited run
Identical copies
Lead Time
3–18 months
In stock
Price
$200–$12,000+
$100–$2,000 typically
Resale Value
Often appreciates (if maker established)
Generally depreciates
Customization
Full control over specs
None
Availability
Limited by maker capacity
Readily available
Production knives offer immediate gratification and lower entry costs. You can walk into a shop and buy a limited-edition Benchmade or Spyderco today. Custom knives require patience and planning but offer uniqueness and potential value appreciation.
The resale value difference is significant. A production knife typically loses 20–40% of its value after purchase. A custom knife by an established maker – especially a deceased master like Bob Loveless – can appreciate 3–5× its original price at auction. However, appreciation is not guaranteed and depends heavily on the maker’s reputation trajectory.
Who should choose custom? Collectors with patience, a defined aesthetic focus, and capital to invest. Who should choose production? Collectors who want immediate ownership, prefer established brands, or are building a broad collection on a tight budget.
Key Takeaway: Custom handmade knives offer uniqueness and appreciation potential but require 3–18 month waits and $200–$12,000+ investment. Production collector knives offer immediate availability and lower prices but typically depreciate. Choose custom for investment and uniqueness; choose production for accessibility.
Frequently Asked Questions About Custom Collector Knives
How much should I budget for my first custom handmade collector knife?
Direct Answer: Start with $300–$500 for an entry-level piece from an emerging maker to learn what you value before investing in higher-tier work.
A first custom knife should be affordable enough that you don’t regret it if your preferences change, but substantial enough to represent real craftsmanship. Entry-level stock-removal knives in CPM-154 with G10 handles hit this sweet spot. You’ll learn about fit and finish, handle ergonomics, and steel performance without overcommitting capital. Once you understand your preferences, you can commission mid-tier work ($800–$2,750) or save for investment-grade pieces.
How do custom handmade knives compare to limited-edition production knives for collectors?
Direct Answer: Custom knives offer true uniqueness and appreciation potential; limited-edition production knives offer brand prestige and immediate availability but rarely appreciate in value.
Most people agree that factory knives simply can’t be compared to well made fine custom knives by established knife makers. A limited-edition Benchmade or Spyderco is still mass-produced, even if only 500 units exist. A custom knife is one-of-a-kind. For collectors prioritizing investment and uniqueness, custom wins. For collectors who want established brand heritage and immediate ownership, production wins.
How long does it take to commission a custom knife from a maker?
Direct Answer: Timelines range from 3–6 months for emerging makers to 12–18 months for established ABS Master Smiths, depending on waitlist.
Standard practice is 25–50% deposit to begin work, with the balance due upon completion. Emerging makers often have shorter waits because they’re building their reputation. Established Master Smiths have long waits because demand exceeds capacity. Ask about the timeline before committing – a maker unwilling to specify a delivery window is a red flag.
What are the biggest risks when buying custom knives online?
Direct Answer: The primary risks are unverifiable maker credentials, lack of provenance documentation, and commissioning from makers with no portfolio or references.
Red flags include: makers requesting full payment upfront with no contract, inability to show completed pieces with customer references, use of generic stock photos, and no verifiable ABS credentials. Always request a written specification document before paying any deposit. Verify the maker’s credentials through the ABS directory or collector community forums. Ask for references from previous customers and follow up with them.
Do custom handmade knives hold or increase in value over time?
Direct Answer: Custom knives by established or deceased master makers often appreciate 3–5× their original price; emerging maker pieces may depreciate or hold value depending on the maker’s reputation trajectory.
The clearest documented appreciation occurs with deceased master makers like Bob Loveless, whose pieces now command $3,000–$8,000 at auction compared to their original $500–$1,000 prices. Living makers’ work may not appreciate on the same trajectory. Appreciation depends on: maker reputation, steel type (damascus and W2 typically outperform stainless), handle materials (exotic materials add value), and provenance documentation. Without documentation, even beautiful knives are harder to authenticate and resell.
What certifications should I look for in a custom knife maker?
Direct Answer: ABS Journeyman Smith (JS) and ABS Master Smith (MS) designations are the most meaningful credentials, with Master Smith representing the highest tier.
An ABS Journeyman Smith has submitted five knives for formal judging and demonstrated documented smithing experience. An ABS Master Smith has passed a rigorous two-phase performance test – cutting rope, shaving arm hair, and bending the blade 90 degrees without fracture – and represents fewer than 130 smiths worldwide. Verify credentials through the ABS directory. Emerging makers without ABS credentials can still produce quality work, but credentials provide a quality assurance signal that matters for investment-grade purchases.
Ready to Get Started?
For personalized guidance on building your custom collector knife collection, visit Knife Depot to explore curated selections and connect with expert collectors who can help you navigate the market, identify makers aligned with your aesthetic and budget, and develop a collection strategy tailored to your goals.
Conclusion
Custom handmade collector knives represent a convergence of art, craft, and investment. Whether you’re starting your first collection or adding to an established portfolio, the principles remain consistent: define your focus, vet makers systematically, understand pricing drivers, and document everything.
The market has matured significantly. Blade Show Atlanta attracts thousands of collectors annually. Online communities provide transparent pricing and vetting information. Auction results demonstrate that collector knives can appreciate meaningfully over time – but only if you buy from established makers, maintain provenance documentation, and store pieces properly.
Start small with entry-level pieces under $500. Learn what you value. Build relationships with makers. Then scale deliberately into mid-tier and investment-grade work. The collectors who build the most rewarding collections aren’t those who spend the most money – they’re the ones who invest time in research, patience in commissioning, and care in preservation.
You're standing in your kitchen, staring at a cutting board full of vegetables. Your current knife feels dull after three uses. You've heard about carbon steel knives – they're sharper, they hold an edge longer, but they rust, right? And they need constant babying?
This guide cuts through the noise. You'll learn why professional chefs prefer carbon steel, which alloy grades matter most, how to prevent rust (spoiler: patina is your friend), and which specific knives are worth buying at every price point.
The key misconception: "High carbon stainless" is not the same as carbon steel. High carbon stainless (like VG-10) contains both high carbon and significant chromium. It's a hybrid. True carbon steel is reactive – and that's intentional.
Key Takeaway: High carbon steel (0.6–2.1% C, <3% Cr) achieves higher hardness than stainless, enabling finer edges. Stainless (≥10.5% Cr) resists rust but can't match carbon steel's sharpness or edge retention.
Why Do Chefs Choose Carbon Steel Over Stainless?
The answer comes down to four performance metrics.
Hardness and edge geometry: Japanese steel is typically harder (60+ HRC) and finely grained, allowing a thin edge to hold without crumbling. German stainless typically runs 56–58 HRC. That extra hardness lets carbon steel blades sustain a 10–15° sharpening angle per side; stainless needs 20–25° to avoid rolling. A thinner edge cuts with less resistance.
Key Takeaway: Carbon steel achieves HRC 60–65 vs. stainless at HRC 54–58, enabling 10–15° sharpening angles and 15–20% better edge retention. Annual maintenance: $10–30 (oil + whetstone) vs. $60–80 for professional stainless sharpening.
Which Carbon Steel Alloy Is Best for Chef Knives?
Not all carbon steel is created equal. The alloy grade – the specific carbon percentage and trace elements – determines real-world performance.
Alloy
Carbon %
Hardness (HRC)
Toughness
Best For
Cost
1075
0.70–0.80
58–60
Excellent
Budget, chopping-heavy
$
1084
0.84
60–62
Very Good
Beginners, all-purpose
$$
1095
0.95–1.05
61–63
Good
Edge enthusiasts
$$
52100
1.0 + Cr
61–64
Very Good
Fine edge retention
$$$
Aogami Super
1.3 + W, V
65–67
Fair
Maximum edge retention
$$$$
Shirogami #1
1.25–1.35
62–64
Good
Premium Japanese
$$$
1084 is the recommended beginner alloy. It's forgiving during heat treatment, easy to sharpen, and achieves a sweet spot of hardness (60–62 HRC) without excessive brittleness. Most budget-to-mid-range Japanese knives use 1084 or similar grades.
52100 bearing steel is the edge fanatic's choice. 52100 produces extremely fine carbides due to its chromium content and responds excellently to thermal cycling, yielding best-in-class edge retention among common carbon alloys. You'll find it in premium production knives and custom blades.
Aogami (Blue Steel) Super is the hardest production option. Aogami Super contains W, V additions on top of the high carbon base, achieving 65–67 HRC with exceptional wear resistance. The tradeoff: brittleness increases. Chipping risk rises above 62 HRC.
Shirogami (White Steel) #1 is the traditional Japanese choice. Hitachi Metals' Yasugi Specialty Steel produces White Steel #1 at high carbon content, achieving 62–64 HRC with good toughness. It's the steel in premium knives like Masamoto KS.
Key Takeaway: 1084 steel is best for beginners (HRC 60–62, forgiving). 52100 or Aogami Super for edge retention fanatics (HRC 63–67, higher chipping risk). Shirogami #1 for premium Japanese knives (HRC 62–64, balanced).
How Do You Care for a High Carbon Steel Chef Knife?
This is where most buyers hesitate. Maintenance fear is real – but it's overblown.
Immediate after-use care:
Wipe the blade dry within 2 minutes of use
Apply a thin layer of food-grade mineral oil or camellia oil
Store in a knife block or on a magnetic strip (not a drawer)
Red or orange flaking? That's active rust. It's loose, non-adherent, and can flake into food. Remove it with a baking soda paste (sodium bicarbonate + water applied with a cloth). Takes 5–10 minutes.
Sharpening schedule:
Hone (realign the edge) every 2–3 uses with a honing steel
Full sharpen (remove metal) every 2–3 months for home use
Japanese knives: 15° per side. German / Western knives: 20° per side
Acidic storage environments (don't leave in lemon juice)
Dishwashers
Annual maintenance cost: A 100mL bottle of camellia oil (~$10–12) and a whetstone combo ($25–60, amortized over 5 years) totals roughly $10–30/year. Professional sharpening for stainless owners runs $15–25 per session × 2–4 times yearly = $30–100/year.
Key Takeaway: Wipe dry immediately, apply thin oil layer, store properly. Patina (grey-blue) is protective; red rust requires baking soda paste removal. Annual cost: $10–30 vs. $60–80 for professional stainless sharpening.
Top High Carbon Steel Chef Knives Worth Buying in 2026
Budget pick (~$40–60): Fujiwara FKM
The Fujiwara FKM is a Japanese workhorse. It uses Swedish Sandvik 1K6 carbon steel, achieves a respectable edge out of the box, and responds well to whetstones. Handle is simple but comfortable. Best for: vegetable prep, slicing, all-purpose home use. The edge isn't as refined as premium options, but the value is exceptional.
Mid-range pick (~$100–180): Misono Sweden Steel Gyuto
Misono's Sweden steel line uses high-carbon Swedish steel with excellent factory edge and good patina development. Widely used in professional Japanese kitchens. The balance is exceptional – not too heavy, not too light. Best for: all-purpose kitchen work, professional home cooks. Price typically runs $120–160.
Premium pick (~$250–350): Masamoto KS Gyuto
Masamoto KS gyuto in White Steel #2 is one of the most revered Japanese kitchen knives, with exceptional out-of-box sharpness and responsive to whetstones. The blade is thin, the edge is laser-sharp, and it holds that edge through multiple dinner services. Best for: precision slicing, professional use, collectors. Price: $280–320.
Japanese carbon steel alternative: Tojiro DP Gyuto
Wait – Tojiro DP uses VG-10, which is stainless, not carbon steel. Skip this if you want true reactive steel. But if you want Japanese geometry with stainless durability, it's a solid compromise.
Quick comparison:
Knife
Steel
HRC
Price
Best For
Fujiwara FKM
Sandvik 1K6
~60
$40–60
Budget, beginners
Misono Sweden
Swedish carbon
~61
$120–160
Mid-range, all-purpose
Masamoto KS
Shirogami #2
62–63
$280–320
Premium, professionals
Key Takeaway: Fujiwara FKM ($50) for beginners; Misono Sweden ($140) for balanced performance; Masamoto KS ($300) for premium edge retention and precision. Heat treatment quality matters more than alloy alone – two 1095 knives can differ by 5+ HRC points.
Is a High Carbon Steel Chef Knife Right for You?
Ask yourself these four questions:
1. How often do you cook? If you cook 4+ times per week, carbon steel's edge retention pays dividends. Casual cooks (1–2 times weekly) may not notice the difference.
2. Are you willing to hand wash and oil? If you're a dishwasher-everything person, stainless is safer. Carbon steel requires immediate post-use care and oiling.
3. Do you have a whetstone or access to one? Carbon steel sharpens easily at home. If you don't own a whetstone and won't buy one, factor in $15–25 professional sharpening sessions.
4. What's your budget? Entry-level carbon steel ($40–60) competes with mid-range stainless. Premium carbon steel ($250+) is an investment, but it lasts decades.
Who should buy carbon steel:
Home cooks who cook frequently and want sharper, longer-lasting edges
People willing to hand wash and apply oil
Knife enthusiasts interested in patina development and steel science
Cooks who sharpen at home or enjoy the learning curve
Who should stick with stainless:
Busy people who want zero maintenance
Dishwasher users
Cooks who prefer durability over maximum sharpness
People intimidated by rust or patina
For first-time carbon steel buyers: Start with a mid-range option like the Misono Sweden Steel ($120–160). It's forgiving, performs well, and won't break the bank if you decide carbon steel isn't for you.
Key Takeaway: Carbon steel is best for frequent home cooks willing to hand wash and sharpen at home. Stainless is better for low-maintenance users. First-timers should start with a $100–160 mid-range option.
Frequently Asked Questions
Does high carbon steel rust easily?
Direct Answer: High carbon steel is reactive and will develop surface rust if left wet or stored improperly. However, a protective patina forms with regular use, significantly reducing rust risk.
How is high carbon steel different from high carbon stainless steel?
Direct Answer: High carbon steel contains minimal chromium (<3%) and is reactive with moisture and acidic foods. High carbon stainless contains ≥10.5% chromium and resists rust passively.
High carbon stainless (like VG-10) is a hybrid – it offers better edge retention than standard stainless but won't develop patina or require the same maintenance as true carbon steel. If you want reactive steel behavior, choose true carbon steel. If you want low maintenance, choose high carbon stainless.
How often do you need to sharpen a carbon steel chef knife?
Direct Answer: Hone (realign the edge) every 2–3 uses with a honing steel. Perform a full sharpen (remove metal) every 2–3 months for home use.
Japanese knives are typically sharpened to 15° per side, which is more acute than Western knives (20° per side). The higher hardness of carbon steel allows these thinner angles without rolling. A $25 whetstone and 10 minutes restores the edge.
What is the best high carbon steel chef knife for beginners?
Direct Answer: The Fujiwara FKM ($50) or Misono Sweden Steel ($140) are excellent beginner options. Both use forgiving alloys that sharpen easily and perform well out of the box.
Avoid ultra-hard alloys like Aogami Super (HRC 65–67) as a first knife – they're brittle and unforgiving if your sharpening technique isn't perfect. Start with 1084 or similar grades (HRC 60–62).
Can you use a carbon steel knife on acidic foods like tomatoes?
Direct Answer: Yes, you can use carbon steel on acidic foods. In fact, acidic ingredients accelerate patina development, which is protective.
How much does a quality high carbon steel chef knife cost?
Direct Answer: Budget options start at $40–60 (Fujiwara FKM). Mid-range knives run $100–180 (Misono Sweden Steel). Premium Japanese carbon steel reaches $250–350 (Masamoto KS).
Price differences within the same alloy grade are driven by heat treatment quality, fit and finish, and brand reputation. A $30 and $300 knife made from identical 1095 steel will perform very differently due to quench and temper protocols.
Is carbon steel harder to maintain than stainless steel?
Direct Answer: Carbon steel requires more active maintenance (hand washing, oiling, patina management) but is easier and cheaper to sharpen. Stainless is more passive but often requires professional sharpening.
Explore Knife Depot's curated selection of high carbon steel chef knives, including the Fujiwara FKM, Misono Sweden Steel, and Masamoto KS. Each product page includes detailed steel specifications, care instructions, and customer reviews to help you make an informed decision. Whether you're upgrading from a dull stainless blade or investing in your first premium carbon steel knife, we're here to guide you.
Conclusion
High carbon steel chef knives aren't for everyone. They demand attention – wipe dry, apply oil, sharpen regularly. But if you cook frequently and value sharpness and edge retention, the payoff is real.
Start with a mid-range option like the Misono Sweden Steel ($120–160). Learn the maintenance routine. Develop a patina. Then decide if carbon steel is your long-term choice. If it is, you've found a blade that will outlast you – and possibly become a family heirloom.
TL;DR: – Spyderco has dominated pocket knife innovation since 1976, and choosing the right model depends on steel type, lock mechanism, and intended use.
Budget picks like the Tenacious ($45) work for casual tasks; mid-tier models like the Para 3 ($130) suit everyday carry; premium options like the Para Military 2 ($180) justify their cost through superior edge retention.
Steel choice matters most: VG-10 excels in corrosion resistance for coastal use, while S45VN offers 3× better edge retention than budget 8Cr13MoV under identical cutting tasks.
Why Choose Spyderco for Your Pocket Knife?
Spyderco was founded in 1976 by Sal Glesser in Golden, Colorado, and the company fundamentally changed how folding knives work. Before Spyderco, pocket knives were largely utilitarian afterthoughts. Then came three innovations that became industry standard: the pocket clip (so you could actually carry a knife without it disappearing into your pocket), the round thumb-hole opener (letting you deploy the blade one-handed), and factory-serrated edges on production folders. These weren't luxury features – they were practical solutions that every knife maker now copies.
What makes Spyderco worth considering today? The brand spans roughly $30 to $500+ depending on model and materials, so there's genuine range. You're not locked into premium pricing. But here's the thing: Spyderco's reputation rests on consistent quality across price tiers. A $45 Tenacious and a $180 Para Military 2 both feel like knives made by people who actually use knives. That matters when you're carrying something daily.
The brand also maintains manufacturing across multiple facilities – USA production in Golden, Colorado for premium models, Japanese production in Seki City for mid-tier folders, and budget lines from Taiwan and China. This gives you transparency about where your knife comes from and what that means for quality and price.
Key Takeaway: Spyderco's 50-year track record of innovation combined with transparent manufacturing and pricing across $30–$500 makes it the most accessible entry point for serious pocket knife buyers.
What Are the Main Spyderco Model Categories?
Spyderco's catalog can feel overwhelming – they make over 100 models. But they organize into four clear categories that match different carry styles and budgets.
Lightweight EDC (under $100) includes the Delica 4 and Dragonfly series. These are your "I carry this every day and barely notice it's there" knives. The Delica 4 in VG-10 with FRN handle typically retails around $75–$85 and is manufactured in Seki City, Japan. It's compact, weighs almost nothing, and the VG-10 steel resists surface rust better in salt air due to higher chromium content, making it practical for coastal carry.
Mid-Range Workhorses ($80–$150) are where most serious users land. The Para 3 in S30V retails for approximately $120–$135 and uses the Compression Lock – a mechanism that lets you close the blade safely with one hand without fingers crossing the blade path. The Native 5 in S35VN typically retails around $110–$125 and is USA-made in Golden, Colorado. These are the knives that balance performance, durability, and price without compromise.
Premium/Collector ($150–$300+) includes the Para Military 2 in CPM-S45VN, typically retailing between $165 and $185, and the Manix 2. These are for people who use their knives hard or want to own something they'll keep for decades. The jump in steel quality and manufacturing precision is real.
Tactical models like the Shaman and Sage series sit across price tiers but emphasize aggressive blade shapes and robust construction for outdoor and professional use.
Category
Key Models
Price Range
Best For
Lightweight EDC
Delica 4, Dragonfly
$30–$85
Pocket carry, minimal weight
Mid-Range
Para 3, Native 5, Endura 4
$80–$150
Daily work, outdoor tasks
Premium
Para Military 2, Manix 2
$150–$250
Heavy use, collectors
Tactical
Shaman, Sage series
$100–$200
Bushcraft, professional use
Key Takeaway: Spyderco's four main categories let you match budget to use case in under 5 minutes – lightweight EDC for pocket carry, mid-range for daily work, premium for durability, tactical for outdoor intensity.
How Do Spyderco Steel Types Affect Performance and Price?
Steel choice is the single biggest performance variable in any pocket knife, and it's also the most confusing part of buying. Here's why it matters: the steel determines how long your blade stays sharp, whether it rusts, and how hard it is to sharpen. Get this wrong, and you'll either be sharpening constantly or fighting rust.
Budget steels like 8Cr13MoV (used in the Tenacious at ~$45) offer adequate corrosion resistance but significantly lower edge retention than premium options. Think of 8Cr13MoV as the "gets the job done" steel – it's easy to sharpen, won't rust in normal conditions, and costs almost nothing. But under equivalent cutting tasks, S45VN holds an edge roughly 3× longer than 8Cr13MoV between sharpenings. If you're cutting cardboard or rope weekly, that matters.
Mid-tier steels like S30V and S35VN ($80–$200 price range) represent the real-world sweet spot. S30V offers meaningfully better edge retention than VG-10 in most head-to-head tests while remaining a stainless steel, though it is somewhat harder to sharpen. S35VN improves on S30V with added niobium for better toughness and easier sharpening while sacrificing minimal edge retention. The Para 3 uses S30V; the Native 5 uses S35VN. Both are excellent choices for everyday carry.
Premium steels like M4 and Maxamet ($150–$400+) are for specialists. M4 has outstanding wear resistance and edge retention but contains only ~4% chromium, making it essentially a non-stainless steel that requires active maintenance to prevent rust. Maxamet reaches approximately 70 HRC and offers exceptional wear resistance, but its near-zero corrosion resistance and sharpening difficulty make it a specialty choice for experienced users. These aren't for humid climates or saltwater carry unless you're willing to oil your knife after every use.
Steel
Hardness (HRC)
Edge Retention
Corrosion Resistance
Typical Price Tier
Best For
8Cr13MoV
57–59
Low
Good
Under $80
Budget EDC, casual use
VG-10
60–61
Medium
Excellent
$75–$100
Coastal carry, food prep
S30V
61–62
High
Very Good
$100–$180
Serious EDC, outdoor work
S35VN
61–62
High
Very Good
$100–$150
Balanced performance, USA-made
S45VN
62–63
Very High
Excellent
$150–$200
Heavy use, long intervals between sharpening
M4
64–65
Exceptional
Poor
$150–$300
Specialty use, active maintenance required
Here's a practical scenario: you're carrying a knife for coastal hiking. VG-10 resists surface rust better in salt air due to higher chromium content (15% vs 14% in S30V), making the Delica 4 a practical beach EDC even though it's a budget model. But if you're doing heavy cutting tasks inland, the Para 3's S30V will outperform the Delica 4 significantly over time.
Key Takeaway: Steel choice drives total cost of ownership: 8Cr13MoV requires frequent sharpening but costs $45; S45VN costs $180 but holds an edge 3× longer, breaking even after 5–7 sharpenings.
Spyderco Lock Mechanisms: Which One Is Right for You?
Lock mechanism is the second-most important decision after steel, because it affects safety, one-handed operation, and legal carry in your jurisdiction. Spyderco uses four main lock types, and each has real trade-offs.
Compression Lock (Para 3, Para Military 2) is Spyderco's signature mechanism that allows one-handed blade closing without fingers crossing the blade path. The spring sits on the spine of the handle – you press it, the lock collapses, and the blade closes safely. This is widely regarded as one of the most secure locking mechanisms on production folders, with lateral strength that exceeds most liner lock implementations. The real-world advantage: you can close the blade in under 2 seconds with one hand while the other hand is occupied with rope, wood, or whatever you're cutting.
Back Lock (Endura 4, Delica 4) is one of the strongest lock mechanisms ever designed – simple, proven, and nearly impossible to fail. The catch: it requires two hands to close or deliberate technique to disengage safely. If you're wearing gloves or your hands are wet, closing a back lock takes longer. This is a real limitation for trade and outdoor work.
Ball Bearing Lock (Manix 2) uses a captive ball cage in the handle that's actuated from either side. The Manix 2's Ball Bearing Lock is one of the only truly ambidextrous lock mechanisms Spyderco offers, making it ideal if you're left-handed or want maximum flexibility. It's strong and smooth, though slightly more complex than a back lock.
Wire Clip/Liner Lock (entry-level models) is the traditional folding knife lock – a spring-loaded bar on the blade's spine. It works, it's simple, and it's found on budget models. It's not as strong as the other three, but for light EDC use, it's perfectly adequate.
Key Takeaway: Compression Lock enables one-handed closing (real advantage for outdoor work); Back Lock is strongest but requires two hands; Ball Bearing Lock is the only truly ambidextrous option. Check local carry laws – blade length restrictions vary sharply by city.
Top Spyderco Pocket Knives by Budget and Use Case (2026)
This is where theory meets reality. Here are the models that actually deliver value at each price tier, matched to what you'll actually do with them.
Under $80: The Tenacious and Delica 4
The Spyderco Tenacious retails for approximately $45–$55 and uses 8Cr13MoV steel with a G-10 handle. It's manufactured in China. This is your "I want a real Spyderco without spending much" knife. The blade is a full flat grind, meaning it thins from spine to edge, reducing wedging and excelling at slicing tasks like food prep and box cutting. You'll sharpen it more often than premium models, but at this price, you can afford to learn sharpening without guilt.
The Delica 4 in VG-10 with FRN handle typically retails around $75–$85 and is manufactured in Seki City, Japan. FRN (Fiberglass Reinforced Nylon) is textured bi-directionally and performs surprisingly well in wet conditions despite being lighter and cheaper than G-10. The back lock is strong, the blade is compact, and the Japanese manufacturing shows in the fit and finish. This is the gold standard of lightweight EDC.
$80–$150: The Para 3 and Native 5
The Para 3 in S30V retails for approximately $120–$135 and uses the Compression Lock. It's a compact version of the Para Military 2, meaning you get that one-handed closing advantage in a smaller package. S30V holds an edge significantly longer than budget steels, and the full flat grind excels at real-world cutting tasks.
The Native 5 in S35VN typically retails around $110–$125 and is USA-made in Golden, Colorado. S35VN is slightly easier to sharpen than S30V while maintaining excellent edge retention. The leaf-shaped blade is a classic design that works for almost any cutting task. If you want American manufacturing and balanced performance, this is it.
$150–$250: The Para Military 2 and Manix 2
The Para Military 2 in CPM-S45VN typically retails between $165 and $185. This is Spyderco's flagship production EDC. S45VN is a meaningful upgrade over S35VN – better edge retention, better corrosion resistance. The Compression Lock is smooth and strong. The full flat grind is aggressive. This is the knife that justifies its price through performance over years of use.
The Manix 2 sits in the same price range and offers the Ball Bearing Lock's ambidextrous advantage. If you're left-handed or want maximum operational flexibility, the Manix 2 is worth the premium.
Blade Shape Matters
Drop point (Para Military 2, Para 3) is versatile – good for slicing, piercing, and general work. Leaf shape (Native 5) is classic and balanced. Wharncliffe (flat edge with upswept tip) excels at precise cutting and food prep. Choose based on what you'll actually cut.
Handle Material Comparison
FRN is lightweight and affordable but less durable than G-10. G-10 is textured, grippy in wet conditions, and lasts longer. Titanium is premium – lighter than G-10, corrosion-proof, and expensive. For most users, G-10 is the practical choice.
Use Case
Recommended Model
Steel
Price
Why
Pocket carry, minimal weight
Delica 4
VG-10
$80
Weighs almost nothing, excellent corrosion resistance
Daily work, outdoor tasks
Para 3
S30V
$130
One-handed close, excellent edge retention
Heavy use, long intervals between sharpening
Para Military 2
S45VN
$180
Best-in-class edge retention, proven design
Left-handed carry, ambidextrous operation
Manix 2
S90V
$200
Ball Bearing Lock works from either side
Budget EDC, casual cutting
Tenacious
8Cr13MoV
$45
Affordable, adequate performance, easy to sharpen
Key Takeaway: Para 3 ($130) is the entry point to serious EDC; Para Military 2 ($180) justifies its cost through 3× better edge retention than budget models; Delica 4 ($80) is the best lightweight option for coastal or minimal-carry use.
How to Maintain and Care for Your Spyderco Knife
You've bought the knife. Now keep it working. Basic maintenance takes under 10 minutes and extends blade life significantly.
Cleaning and Disassembly
After heavy use, disassemble the knife if you're comfortable doing so. Most Spyderco folders have a pivot screw that lets you separate the blade from the handle. Rinse the blade and handle under warm water with a soft brush to remove dirt and debris. Dry everything thoroughly – moisture is the enemy of non-stainless steels like M4.
Lubrication
Tuf-Glide pen applicator and Nano-Oil are among the most recommended lubricants in the Spyderco community for pivot maintenance and corrosion prevention. Apply a tiny amount to the pivot and blade spine. A little goes a long way – over-lubrication attracts dirt.
Sharpening
The Tri-Angle Sharpmaker is designed for 15° and 20° edge angles, accommodating most Spyderco production knives which are factory sharpened at approximately 15–20° per side. The Sharpmaker retails for approximately $70 and breaks even against professional sharpening ($10–$15/session) after approximately 5–7 uses. If you carry a Spyderco regularly, owning a Sharpmaker is the rational long-term choice.
Pivot Maintenance
Check the pivot screw occasionally. If the blade is loose, tighten it slightly – but don't over-tighten, which can bind the blade. If the blade is too tight, loosen it until it swings freely.
Storage
Avoid prolonged moisture contact for non-stainless steels. If you carry an M4 knife in a humid climate, wipe it down and oil it after use. Stainless steels like S30V and S35VN are more forgiving but still benefit from occasional oiling.
Frequency
Light EDC use (cutting rope, opening packages): clean monthly, sharpen every 3–4 months. Heavy use (outdoor work, daily cutting): clean weekly, sharpen monthly.
Key Takeaway: Invest $70 in a Sharpmaker, clean your knife monthly, and oil the pivot occasionally. This routine takes 10 minutes and keeps your blade sharp for years.
Frequently Asked Questions About Spyderco Pocket Knives
How much should I spend on my first Spyderco pocket knife?
Direct Answer: Start with a $75–$130 model like the Delica 4 or Para 3. This price range gives you genuine Spyderco quality without the premium cost, and it's high enough that you'll actually use the knife instead of treating it as a collectible.
Budget models under $50 work if you want to test the waters, but you'll quickly outgrow them. Premium models over $200 are worth it only if you know exactly what you want and plan to carry the knife daily for years. The mid-tier sweet spot lets you learn what features matter to you before committing to a premium purchase.
How does the Spyderco Para Military 2 compare to the Para 3?
Direct Answer: The Para Military 2 is larger with a 3.44" blade; the Para 3 is compact with a 2.87" blade. Both use the Compression Lock and full flat grind. The Para Military 2 in S45VN ($180) has better edge retention than the Para 3 in S30V ($130), but the Para 3 is easier to carry and pocket-friendly.
Choose the Para Military 2 if you want maximum cutting power and don't mind the size. Choose the Para 3 if you want serious performance in a compact package that disappears in your pocket. The Para 3 is the better choice for urban EDC; the Para Military 2 is better for outdoor work.
Are Spyderco pocket knives legal to carry every day?
The Delica 4's 2.87" blade falls under the most common municipal knife carry length restrictions, making it a safer choice for urban carry. Check your city and state statutes – knife laws vary sharply by location, and ignorance isn't a defense.
Which Spyderco steel is best for outdoor and bushcraft use?
Direct Answer: S35VN or S45VN for stainless performance, or M4 if you're willing to maintain it actively. S35VN improves on S30V with added niobium for better toughness without significant edge retention loss, making it ideal for outdoor and bushcraft use. M4 has outstanding wear resistance and edge retention but requires active maintenance to prevent rust.
For coastal or humid environments, stick with S35VN or S45VN. For dry climates where you can oil your knife regularly, M4 offers exceptional edge retention.
How often does a Spyderco knife need sharpening?
Direct Answer: Light EDC use (cutting rope, opening packages): every 3–4 months. Heavy use (outdoor work, daily cutting): monthly. The exact interval depends on what you're cutting and your steel choice – S45VN lasts roughly 3× longer between sharpenings than 8Cr13MoV.
If you sharpen monthly, the $70 Sharpmaker breaks even against professional sharpening ($10–$15/session) after approximately 5–7 uses. For regular users, owning a Sharpmaker is cheaper than professional service over time.
What is the Spyderco Compression Lock and why does it matter?
Direct Answer: The Compression Lock allows one-handed blade closing without fingers crossing the blade path. You press a spring on the spine of the handle, the lock collapses, and the blade closes safely. This is a genuine safety advantage over liner locks and makes the knife practical for outdoor work when one hand is occupied.
The Compression Lock is widely regarded as one of the most secure locking mechanisms on production folders, so you're not sacrificing strength for convenience. It matters because it changes how you actually use the knife in real-world scenarios.
Are Spyderco knives worth the price compared to cheaper alternatives?
Direct Answer: Yes, if you plan to use the knife regularly. The Para Military 2 in S45VN ($180) holds an edge roughly 3× longer between sharpenings than the Tenacious in 8Cr13MoV ($45) under equivalent cutting tasks. Over a year of daily use, you'll sharpen the Tenacious 12+ times and the Para Military 2 maybe 4 times. Factor in sharpening time and cost, and the Para Military 2 becomes the rational choice.
Spyderco's reputation for quality, innovation, and customer service justifies the price if you're buying a knife you'll actually carry. If you want a collectible that sits in a drawer, cheaper alternatives exist. If you want a tool that works reliably for years, Spyderco delivers.
Conclusion
Choosing a Spyderco pocket knife doesn't require expertise – it requires matching your budget and use case to the right model. Spyderco's 50-year track record of innovation combined with transparent manufacturing and pricing across $30–$500 makes it the most accessible entry point for serious pocket knife buyers.
Start with the Delica 4 if you want lightweight EDC, the Para 3 if you want serious performance in a compact package, or the Para Military 2 if you're ready to invest in a knife that will last decades. Understand your steel choice – it drives total cost of ownership more than anything else. Check your local carry laws before purchasing. And if you're going to use the knife regularly, invest in a Sharpmaker.
Ready to find your next carry? Knife Depot stocks the full Spyderco lineup with detailed product information and competitive pricing. Browse their folding pocket knife collection to compare models side-by-side and find the right knife for your needs.
Upgrade Your Everyday Carry
Built for performance. Designed to stand out. Shop knives ready for everyday carry, the outdoors, or your collection.
TL;DR: – Full-tang construction and blade steel grade are your two biggest purchase variables; VG-10 at 60–61 HRC holds an edge through 5–6 field dressing sessions vs. 1095 carbon requiring touch-up after 2–3.
Budget picks ($50–$80) use 440C stainless; mid-tier ($150+) step up to D2 or VG-10 with noticeably better edge retention.
Fixed blades outperform folders in field conditions because they lack the pivot mechanism that traps blood and weakens under torque.
What Makes a Fixed Blade Knife Worth Buying for Hunting?
You're choosing a fixed blade because you need reliability when it matters most – when you're field dressing game in cold, wet conditions where a folding knife's pivot point becomes a liability. The right fixed blade combines four non-negotiable specs: full-tang construction, proven blade steel, handle material that grips when bloody, and a sheath that won't fail under pack pressure.
Full-tang construction means the blade and tang are one continuous piece of steel, eliminating the weakest point of partial-tang designs. This matters because quartering an elk applies lateral torque that can snap a partial tang. You're not just buying a blade – you're buying structural integrity.
Blade steel grade determines edge retention and maintenance burden. According to Knife Steel Nerds, VG-10 stainless at 60–61 HRC outperforms 1095 carbon in edge retention testing, holding a usable edge through approximately 5–6 field dressing sessions before needing a strop, versus 1095 requiring touch-up after 2–3 sessions. The tradeoff: 1095 is easier to sharpen in camp with a stone, while VG-10 demands a strop or professional sharpening.
Handle material determines whether your knife stays in your hand when it's coated in blood and rain. G10 and Micarta maintain grip when wet; wood becomes slippery and cracks with repeated moisture exposure without treatment. Rubber handles offer maximum wet grip but can degrade with petroleum-based product exposure.
Sheath quality is a co-equal component of field performance. Kydex sheaths retain the blade securely under pack pressure and draw silently, while leather sheaths expand when wet and can allow accidental draw. If your sheath fails, your knife becomes a liability.
Key Takeaway: Prioritize full tang, stainless or semi-stainless steel (VG-10, D2), G10/Micarta handles, and Kydex sheaths. These four specs eliminate 80% of low-quality options before you even compare brands.
How Do These Hunting Knives Compare? Full Specs Table
Here's where most reviews fail you: scattered specs across different websites, no HRC hardness data, and no task-specific suitability ratings. Below is a centralized comparison of six production fixed blades with blade length, steel type, hardness, weight, and price range.
Knife
Blade Steel
HRC
Blade Length
Overall Length
Weight (oz)
Price Range
Full Tang
Buck 119 Special
420HC
58
6"
10.75"
7.1
$80–$120
Yes
Benchmade Hidden Canyon Hunter
CPM-S30V
59–60
2.67"
6.2"
2.7
$150–$180
Yes
ESEE-6
1095 Carbon
55–57
6.5"
11.75"
9.9
$120–$150
Yes
Mora Companion HD
Carbon Steel
56–58
4.1"
9.1"
4.1
$20–$30
Stick Tang
Ontario RAT-7
1095 Carbon
55–57
7"
12.5"
11.5
$60–$80
Yes
Boker Arbolito El Heroe
DIN 1.4116
57–59
4.13"
8.5"
5.2
$80–$120
Yes
Why HRC matters: Hardness directly correlates to edge retention in cold, wet hunting conditions. A blade at 57 HRC will dull faster on bone contact than one at 60 HRC, but it's easier to sharpen in camp with a basic stone. Higher HRC (59–61) means fewer touch-ups in the field but requires a strop or professional sharpening.
The Mora Companion HD uses stick-tang construction (the handle is attached to a tang that doesn't extend the full width), which is robust for its $20–$30 price tier but not equivalent to full tang under lateral stress during quartering.
Key Takeaway: The Buck 119 Special and Ontario RAT-7 offer the best full-tang value under $100. The Benchmade Hidden Canyon Hunter is the lightest option at 2.7 oz – ideal for backcountry where every ounce counts. The ESEE-6 is the heaviest at 9.9 oz but excels at hard camp tasks.
Top Fixed Blade Hunting Knives Reviewed (2026)
Best Overall: Buck 119 Special
The Buck 119 Special is the hunting knife that works for 90% of hunters because it doesn't specialize – it generalizes. The 420HC stainless blade at 58 HRC is not premium-tier, but it holds an edge through 3–4 field dressing sessions before needing a strop. The 6-inch blade length is long enough for deer and elk but short enough to control in tight gutting cuts. Full tang, genuine leather sheath, and a price point under $100 make this the no-regrets choice if you're buying your first fixed blade.
Best for: Deer and elk field dressing, general camp use, hunters who want simplicity over specialization.
Limitation: 420HC doesn't match VG-10 or D2 in edge retention. You'll strop more frequently than with premium steels.
At $60–$80, the Ontario RAT-7 is the best value hard-use hunting and camp knife. The 1095 carbon steel at 55–57 HRC trades some edge retention for toughness – it resists chipping on bone or rock better than higher-HRC blades. The 7-inch blade is long and heavy (11.5 oz total), optimized for camp processing and heavy-duty tasks like splitting kindling or quartering large game.
Best for: Hunters who process their own game, backcountry camp work, anyone who needs a knife that can handle abuse.
Limitation: 1095 corrodes rapidly when exposed to blood and moisture. You must oil and dry it immediately after use in wet conditions. Not ideal for wet-climate hunts without daily maintenance.
Best for Skinning and Field Dressing: Benchmade Hidden Canyon Hunter
The Benchmade Hidden Canyon Hunter is a specialist's knife. At 2.67 inches and 2.7 oz, it's the lightest production fixed blade reviewed here. CPM-S30V steel at 59–60 HRC holds an edge exceptionally well – you'll get 6–7 field dressing sessions before needing a strop. The short blade gives you surgical control when separating hide from muscle.
Best for: Upland bird hunting, small-game processing, backcountry hunts where weight matters, hunters who value precision over power.
Limitation: At 2.67 inches, this blade is insufficient for elk or large-game field dressing. You need leverage that only a 5+ inch blade provides. This is a specialist tool, not a general-purpose knife.
The ESEE-6 is built for hunters who process their own game and spend weeks in the backcountry. The 1095 carbon steel at 55–57 HRC is intentionally softer than premium steels – this trades edge retention for toughness and ease of field sharpening. The 6.5-inch blade and 9.9 oz weight make it a serious tool for splitting wood, quartering elk, and camp chores.
Best for: Backcountry hunters, game processors, anyone who needs one knife to handle everything from field dressing to camp construction.
Limitation: At 9.9 oz, this is heavy for all-day carry. The 1095 steel requires daily oiling in wet conditions. Not ideal if you're hiking 10+ miles daily.
Best Lightweight Option for Backcountry: Mora Companion HD
The Mora Companion HD costs $20–$30 and weighs 4.1 oz. It's a stick-tang knife (not full tang), but the construction is robust for its price tier. The carbon steel blade at 56–58 HRC is easy to sharpen in camp with a basic stone. The 4.1-inch blade handles small-game field dressing and general camp tasks.
Best for: Budget-conscious hunters, backcountry trips where weight is critical, anyone who wants a functional knife without premium pricing.
Limitation: Stick-tang construction means lateral torque can fail the handle-to-blade connection. Not suitable for quartering large game. Carbon steel requires oiling after use in wet conditions.
Best Premium Pick (Over $200): Boker Arbolito El Heroe
The Boker Arbolito El Heroe is a mid-tier European production knife that punches above its weight. DIN 1.4116 stainless steel at 57–59 HRC is comparable to 440A/B – functional but not premium-tier edge retention. The 4.13-inch blade, full-tang construction, and olive wood handle scales make this a knife you'll want to carry for aesthetics as much as performance.
Best for: Hunters who value craftsmanship and aesthetics, those who want a full-tang stainless without paying S30V prices, collectors who appreciate European blade design.
Limitation: DIN 1.4116 doesn't match VG-10 or D2 in edge retention. You'll strop more frequently than with premium steels. Price point ($80–$120) is higher than comparable performance from Buck or Ontario.
Which Blade Steel Should You Choose for Hunting Conditions?
Your hunting environment determines whether you need stainless or carbon steel. This is the single biggest decision after full-tang construction.
Stainless steels (440C, VG-10, DIN 1.4116) are superior for wet and marine environments. VG-10 at 60–61 HRC offers excellent edge retention for a stainless steel and outperforms 1095 in edge retention testing. The tradeoff: stainless steels are harder to sharpen in the field and require a strop rather than a basic stone.
High-carbon steels (1095, D2) offer better edge retention in dry conditions but require oiling within hours of blood exposure to prevent surface oxidation. 1095 is very prone to rust and needs to be oiled and dried immediately after use in wet conditions. If you're hunting in rain or near water, carbon steel becomes a maintenance burden.
D2 tool steel at 59–61 HRC offers superior edge retention to 440C and is easier to field-sharpen than S30V, making it a strong mid-tier hunting steel. D2 has excellent wear resistance and edge retention, better than 440C, but it's semi-stainless (12% chromium) – still requiring more maintenance than full stainless in wet conditions.
Decision matrix:
Wet/marine hunts (coastal, swamp, rain-heavy regions): Choose VG-10 or 440C stainless. Maintenance is minimal.
Dry/camp hunts (desert, high elevation, drive-in camps): Choose 1095 or D2 carbon. Edge retention is superior, and you can sharpen with a basic stone.
Mixed conditions (uncertain weather): Choose D2 as a compromise – better edge retention than 440C, more corrosion-resistant than 1095.
Key Takeaway: VG-10 stainless at 60–61 HRC is the best all-around hunting steel if you hunt in wet conditions. 1095 carbon is the best if you hunt dry and can maintain it daily. D2 splits the difference.
How to Choose the Right Fixed Blade Knife for Your Hunt Type
Blade length is a heuristic, not a law. A blade of 3–4 inches is appropriate for birds and small game; 4–5 inches for deer; 5+ inches for elk/bear processing, based on task geometry and leverage requirements. According to Field & Stream's hunting knife guide, these dimensions align with professional field dressing standards.
Small-game hunts (upland birds, rabbits, squirrels): You need a short blade (2.5–3.5 inches) with surgical control. The Benchmale Hidden Canyon Hunter at 2.67 inches is ideal. Weight matters because you're hiking all day. Stainless steel is preferred because you'll encounter wet brush.
Deer hunts (whitetail, mule deer): A 4–5 inch blade gives you the leverage needed for deep cuts through hide and muscle without being unwieldy in tight gutting cuts. The Buck 119 Special at 6 inches is slightly long but still manageable. Carbon or semi-stainless steel works if you can maintain it.
Elk/bear hunts (big game processing): You need a 5+ inch blade for leverage through thick hide and muscle. The Ontario RAT-7 at 7 inches and ESEE-6 at 6.5 inches are appropriate. Weight becomes less critical because you're processing at camp, not hiking all day. Carbon steel is acceptable because you'll maintain it daily at camp.
Backcountry hunts (10+ mile pack-ins): Weight is critical. Every ounce matters over distance. The Mora Companion HD at 4.1 oz or Benchmale Hidden Canyon Hunter at 2.7 oz are appropriate. You sacrifice some camp utility for portability.
Handle material determines grip in field conditions. G10 and Micarta maintain texture when wet and bloody. Wood is traditional and aesthetically pleasing but becomes slippery when wet. Rubber offers maximum grip but can degrade with petroleum exposure.
Key Takeaway: Match blade length to game size: 3–4" for birds, 4–5" for deer, 5+ inches for elk. Choose stainless for wet hunts, carbon for dry hunts. Prioritize G10/Micarta handles if you process game in the field.
Frequently Asked Questions About Fixed Blade Hunting Knives
How much should I spend on a fixed blade hunting knife?
Direct Answer: Budget picks ($20–$80) use 440C or carbon steel and function adequately for casual hunters. Mid-tier knives ($150–$250) step up to D2 or VG-10 with noticeably better edge retention and full-tang construction.
Budget picks in the $50–$80 range use 440C stainless, which is a serviceable stainless steel but its edge retention is modest compared to better alloys. If you hunt 2–3 times per year and don't process your own game, a $50 knife is sufficient. If you hunt frequently and field dress game, invest $150+ for D2 or VG-10 steel.
Are fixed blade knives better than folding knives for hunting?
Direct Answer: Yes. Fixed blades lack the pivot mechanism that traps blood and debris, and they don't fail under lateral torque during quartering.
Fixed blades outperform folders in field conditions because the absence of a pivot point eliminates a structural weakness. Under lateral torque loads during quartering large game, locking folders can close on fingers – a documented safety concern. Fixed blades are also faster to deploy and cleaner to maintain in the field.
What blade length is best for deer field dressing?
Direct Answer: 4–5 inches. This length provides leverage for deep cuts through hide and muscle without being unwieldy in tight gutting cuts.
The Buck 119 Special at 6 inches is slightly long but still manageable. Anything shorter than 4 inches requires multiple passes; anything longer than 5 inches becomes difficult to control in confined spaces inside the body cavity.
How do I maintain and sharpen a fixed blade hunting knife?
Direct Answer: Carbon steel requires oiling immediately after use in wet conditions. Stainless steel requires minimal maintenance. All blades benefit from stropping (realigning the edge) after 3–4 field dressing sessions.
For field sharpening, carry a basic ceramic rod or leather strop. Carbon steel blades can be sharpened with a basic stone in camp. Stainless steel blades like VG-10 require a strop or professional sharpening because they're harder and don't respond well to field stones.
Is it legal to carry a fixed blade hunting knife while hunting?
Direct Answer: Yes, in most U.S. states during hunting season. However, regulations vary significantly by state and carry method.
California prohibits concealed carry of fixed blade knives regardless of length; Texas imposes no blade length restriction for hunting contexts. Always verify current local law before purchasing – statutes change and vary by county. This is general guidance, not legal advice.
What is the difference between a drop point and clip point blade for hunting?
Direct Answer: Drop point blades have a curved spine that curves downward to the tip, providing a larger cutting surface and better control during field dressing. Clip point blades have a straight spine with a clipped or curved section near the tip, offering a sharper point but less cutting surface.
Drop point is the standard for hunting knives because the curved spine gives you better control when separating hide from muscle. Clip point is more common in general-purpose or tactical knives.
Can I use a fixed blade hunting knife for camp chores and bushcraft tasks?
Direct Answer: Yes, but blade length and steel type determine suitability. A 6+ inch blade with carbon steel excels at camp tasks like splitting kindling and processing firewood. A 3–4 inch blade is limited to food prep and light cutting.
The ESEE-6 and Ontario RAT-7 are optimized for camp processing and heavy-duty tasks. The Benchmale Hidden Canyon Hunter is too short for camp work. Choose a knife that matches both your hunting task and your camp needs.
The Bottom Line
Choosing a fixed blade hunting knife comes down to matching steel type to your hunting environment, prioritizing full-tang construction, and selecting blade length based on game size. VG-10 at 60–61 HRC is the best all-around steel if you hunt in wet conditions. 1095 carbon is the best if you hunt dry and can maintain it daily. The Buck 119 Special offers the best balance of performance and price under $100. The Ontario RAT-7 is the best value for hard-use camp and hunt tasks. The Benchmale Hidden Canyon Hunter is the lightest option for backcountry hunts.
Don't overthink this. A full-tang fixed blade with proven steel and a quality sheath will outlast you. If you're ready to upgrade your hunting kit, Knife Depot carries a curated selection of fixed-blade hunting knives across all price tiers – from budget Mora knives to premium Benchmale and ESEE options. Their inventory includes detailed specs and real-world reviews from hunters who've actually used these knives in the field.
Your next hunt deserves a knife you trust. Choose full tang, proven steel, and a sheath that won't fail. Everything else is refinement.
Upgrade Your Hunting Kit
Built for performance. Designed for the field. Shop fixed blade hunting knives ready for your next hunt, from budget picks to premium options.