Knife Gift Ideas for Men: Holiday & Birthday Guide 2026
TL;DR:
- Budget EDC knives ($30–$75) like the Kershaw Leek and CIVIVI Elementum are the highest-volume gift tier for non-knife-owners
- Kitchen knife gifts split into two tiers: Victorinox Fibrox Pro (~$40) for beginners, premium forged options for serious cooks
- Outdoor/hunting knives ($60–$110) like the Buck 119 and ESEE-4 suit adventurers; pair with a sharpening stone for thoughtfulness
- Premium collector knives ($150+) from Benchmade and Spyderco reward enthusiasts with better steel and lifetime warranties
- Adding accessories (whetstones, sheaths, maintenance kits) elevates any knife gift and shows genuine care
Introduction: Finding the Right Knife for Your Guy
Picking a knife as a gift feels risky. You're not sure if he already owns one. You don't know if he prefers folding or fixed blade. And you're definitely unsure whether a $40 pocket knife or a $150 premium folder is the move.
Here's the thing: knives are one of the most practical gifts you can give. Unlike gadgets that become obsolete, a quality knife stays useful for decades. But the knife world has its own language – blade steels, lock types, tang construction – that can feel overwhelming if you're new to it.
Based on our analysis of knife enthusiast communities, retailer gift guides, and manufacturer recommendations collected through 2026, we've mapped out exactly which knives work best for different types of guys, at every price point. Whether you're shopping for someone who's never carried a knife or a collector with a dozen already, this guide cuts through the noise.
How to Pick the Right Knife Gift for Any Man
Before you land on a specific model, match the knife type to how your guy actually lives.
The Quick Match Table:
| Recipient Type | Best Knife Category | Price Range |
|---|---|---|
| Never carried a knife | EDC pocket knife (folding) | $30–$75 |
| Cooks regularly | Kitchen chef knife or santoku | $40–$160 |
| Hunts or camps | Fixed blade (bushcraft or hunting) | $35–$110 |
| Serious enthusiast | Premium folder or collector piece | $100–$300+ |
| Outdoorsman who does everything | Multi-tool or fixed blade + accessories | $60–$150 |
EDC vs. Kitchen vs. Outdoor vs. Collectible
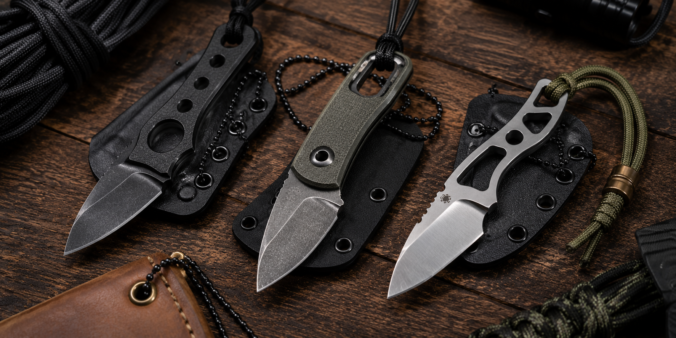
An EDC (everyday carry) pocket knife is small, folds, and lives in a pocket. It's for opening packages, cutting rope, or general utility. Kitchen knives are fixed, larger, and designed for food prep. Outdoor/hunting knives are fixed blades built for hard use in the field. Collector knives prioritize premium materials and craftsmanship over pure utility.
The biggest mistake gift-givers make? Buying a kitchen knife for someone who doesn't cook, or an outdoor knife for someone who never leaves the city. Match the knife to the lifestyle.
One Legal Note: Automatic (switchblade) knives are restricted in multiple U.S. states, and blade length limits for folding knives vary by jurisdiction. Before gifting anything with a blade longer than 3 inches or any automatic mechanism, check your recipient's state laws. Knife Rights Foundation maintains a state-by-state guide.
Key Takeaway: Match knife type to lifestyle first – EDC for daily carry, kitchen for cooks, fixed blade for outdoors, premium for collectors. Check local blade length laws before gifting automatics or large fixed blades.
What Are the Best EDC Pocket Knife Gift Ideas Under $75?
This is the sweet spot for most gift-givers. A pocket knife under $75 is affordable enough to feel like a thoughtful gift without breaking the bank, yet quality enough that the recipient will actually use it.
The best budget EDC knives share three traits: reliable blade steel that holds an edge without constant maintenance, a secure lock mechanism, and a design that's proven across thousands of users. You're not paying for exotic materials here – you're paying for reliability.
Best Budget EDC Knife Gifts Under $50
Kershaw Leek (~$45)
According to Knife Depot, the Kershaw Leek has a ComboEdge stainless steel blade that is four inches long. It features SpeedSafe assisted opening and a liner lock. The 8Cr13MoV steel is a workhorse – it doesn't hold an edge quite as long as premium steels, but it's easy to sharpen and resists corrosion well. This is the knife for someone who wants something reliable without overthinking it.
CIVIVI Elementum (~$40)
The Elementum is available with D2 or 9Cr18MoV blade steel, offering meaningful edge retention at a budget price. At under $45, it's one of the best value propositions in the EDC space. The design is clean, the action is smooth, and it feels more expensive than it costs.
Spyderco Tenacious (~$55)
The Tenacious uses 8Cr13MoV steel and a liner lock, and it's consistently recommended in knife communities as an excellent first serious folding knife. It's slightly larger than the Leek, which some guys prefer. The distinctive Spyderco hole for one-handed opening is a nice touch.
| Model | Blade Steel | Lock Type | Blade Length | Price |
|---|---|---|---|---|
| Kershaw Leek | 8Cr13MoV | Liner Lock | 3" | ~$45 |
| CIVIVI Elementum | D2/9Cr18MoV | Liner Lock | 3.2" | ~$40 |
| Spyderco Tenacious | 8Cr13MoV | Liner Lock | 3.4" | ~$55 |
Best Mid-Range EDC Knife Gifts $50–$75
Benchmade Griptilian (~$70)
Stepping up to $70 gets you into American-made territory. The Griptilian uses 154CM stainless steel (better edge retention than budget steels) and Benchmade's proven AXIS lock. It's heavier than budget options but feels more substantial in hand. Benchmade also offers lifetime sharpening and warranty service, which adds real value.
Spyderco Para 3 (~$75)
If your guy is willing to spend closer to $75, the Para 3 is a step up. It uses CPM-S30V steel, which holds an edge significantly longer than 8Cr13MoV. The compression lock is Spyderco-exclusive and highly regarded. This is the knife for someone who appreciates quality and will use it enough to justify the investment.
Key Takeaway: Under $50, the Kershaw Leek and CIVIVI Elementum offer the best value. At $50–$75, Benchmade and Spyderco models introduce better steel and American manufacturing – worth the jump if your recipient is a serious user.
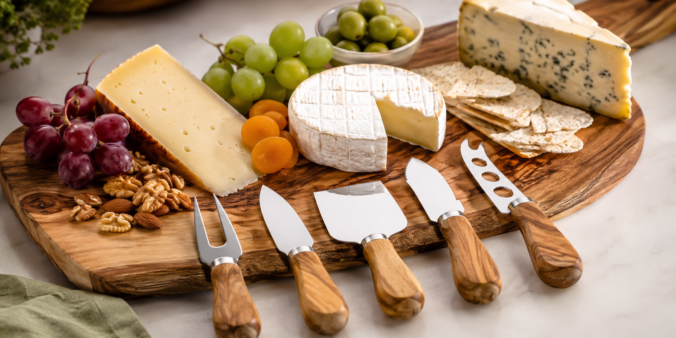
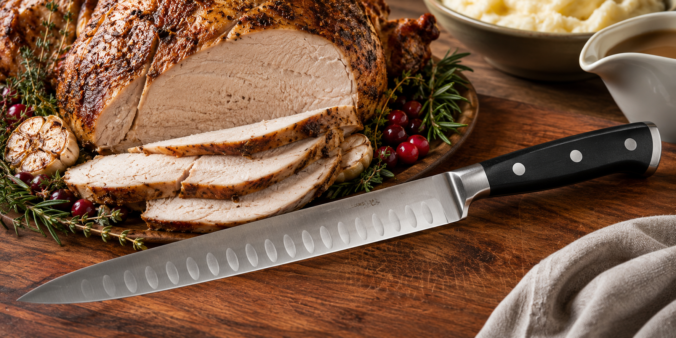
Best Kitchen Knife Gift Ideas for Men Who Cook
Kitchen knives are a different beast. A guy who cooks regularly will use a chef's knife almost daily, so quality matters more than with an EDC knife he might use once a week.
The kitchen knife market splits cleanly into two tiers: budget options that work great for casual cooks, and premium forged knives for people who take cooking seriously.
Victorinox Fibrox Pro 8-inch Chef's Knife (~$40)
According to Knife Depot, the Victorinox Swiss Army Trekker includes 11 other useful tools. But for kitchen work, focus on Victorinox's chef's knife line. The Fibrox Pro is used in culinary schools worldwide. At $40, it's the best value kitchen knife you can buy. The blade is stainless steel (easy to maintain), the handle is NSF-certified, and it actually performs well against knives costing 3x as much.
Wüsthof Classic 8-inch Chef's Knife (~$160)
If your guy is a serious cook – someone who owns multiple pans, reads recipes carefully, and actually sharpens his knives – the Wüsthof Classic is worth the investment. It's forged German steel (X50CrMoV15), which means the blade is shaped from a single piece of steel rather than stamped. Forged blades are heavier, more durable, and hold an edge longer. The Wüsthof comes with a lifetime warranty and feels like a professional tool.
Japanese vs. German Steel (One-Sentence Version)
Japanese kitchen knives tend to be harder and hold a sharper edge but are more brittle and require more careful maintenance. German knives are softer, more forgiving, and easier to sharpen – better for home cooks.
Bonus: Steak Knife Sets
If your guy grills or entertains, a set of 4–6 quality steak knives ($80–$120 from Victorinox or Zwilling) is more useful than cheap sets that dull after two dinners. Cheap steak knives are a waste – spend the extra money.
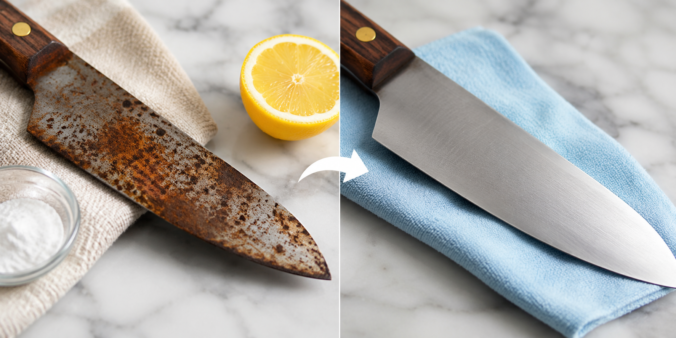
Gifting Tip: Add a whetstone (~$25–$40) to any kitchen knife gift. A King KW-65 whetstone (1000/6000 grit) is widely available and well-regarded. This signals that you understand knives need maintenance and shows real thoughtfulness.
Key Takeaway: Victorinox Fibrox Pro (
$40) for casual cooks; Wüsthof Classic ($160) for serious home chefs. Pair either with a $25–$40 whetstone to show you understand knife care.
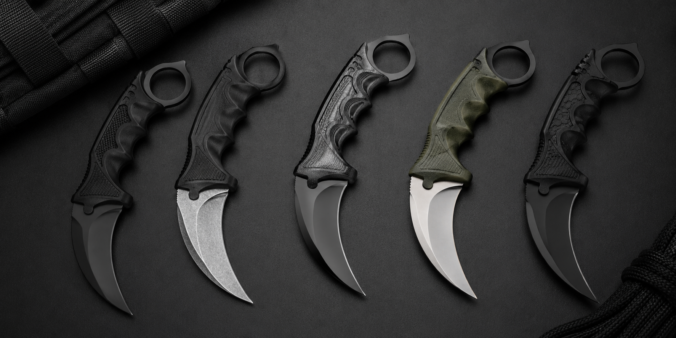
Best Outdoor, Hunting & Camping Knife Gift Ideas
Outdoor knives are where fixed blades shine. A folding knife is great for EDC, but when you're in the field – camping, hunting, bushcrafting – you want a fixed blade that won't fold on you under pressure.
Mora Companion Fixed Blade (~$15–$20)
According to Knife Depot, the Mora Companion is consistently recommended as the best entry-level outdoor knife. At $15–$20, it's almost criminally cheap. The blade is either carbon or stainless steel (stainless is better for low-maintenance users). Mora is a Swedish company with 125 years of history. Bushcrafters love this knife because it's light, sharp, and reliable.
Buck 119 Special (~$60)
According to Knife Depot, the Buck 119 has a 6-inch 420HC stainless blade and phenolic handle with a genuine leather sheath included. Buck is an American company that's been making knives since the early 1900s. The 119 is a classic hunting knife – it's been used by hunters for decades. 420HC is a solid mid-grade stainless steel that responds well to sharpening. Buck offers a lifetime warranty.
ESEE-4 Fixed Blade (~$110)
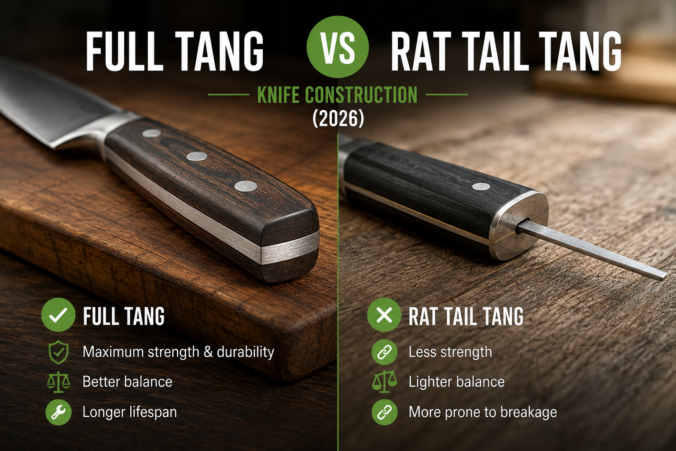
The ESEE-4 is a premium hard-use outdoor knife with full tang construction (the blade steel runs the entire length of the handle, providing maximum strength). It uses 1095 high carbon steel, which takes a razor-sharp edge but requires oiling to prevent rust. This is the knife for someone who camps seriously or does bushcraft regularly. Made in the USA.
Full Tang Matters for Hard Use
A full tang knife has the blade steel running the complete length of the handle, providing maximum strength. A rat-tail tang (where the steel tapers to a thin point) is prone to failure under hard use. For outdoor gifts, always choose full tang.
| Model | Blade Steel | Tang | Best Use | Price |
|---|---|---|---|---|
| Mora Companion | Carbon/Stainless | Full | Bushcraft, entry-level | ~$18 |
| Buck 119 | 420HC Stainless | Full | Hunting, general outdoor | ~$60 |
| ESEE-4 | 1095 Carbon | Full | Hard use, bushcraft | ~$110 |
Accessory Bundle Idea: ESEE-4 ($110) + Fallkniven DC4 sharpening stone ($30) = ~$140 total. This is a thoughtful outdoor gift bundle that shows you understand field maintenance.
Key Takeaway: Mora Companion (
$18) for budget outdoor gifts; Buck 119 ($60) for hunters; ESEE-4 (~$110) for serious bushcrafters. Always choose full tang for hard use. Pair with a portable sharpener for a complete gift.
Best Premium & Collector Knife Gift Ideas ($100–$300+)
At this price point, you're buying for someone who either already owns several knives or is a serious enthusiast. Premium knives justify their cost through better blade steel, superior manufacturing, and often lifetime warranties.
Benchmade Bugout (~$150)
The Bugout is one of Benchmade's most popular everyday carry knives. It features a 3.24-inch S30V blade, the proprietary AXIS lock, and weighs just 2.15 oz – one of the lightest premium EDC options available. S30V steel holds an edge significantly longer than budget steels and resists corrosion exceptionally well. Benchmade's LifeSharp service means your recipient can send it back anytime for free sharpening and nominal-fee warranty repairs.
Spyderco Para 3 (~$140)
The Para 3 uses CPM-S30V steel with Spyderco's compression lock. It's slightly smaller than the Bugout but equally refined. Spyderco has a cult following among knife enthusiasts, and the Para 3 is one of their most respected designs.
Custom or Handmade Options ($150–$500+)
If your guy is a serious collector, consider a custom knife from a known bladesmith. Montana Knife Company has earned recognition for their designs. Custom knives are one-of-a-kind and feel like a genuinely special gift. As noted by TF VooDoo's 2025-2026 Gift Guide, purpose-built tools from specialist makers carry a different kind of weight as gifts – they signal that you understand what the recipient actually values, not just what looks impressive on a shelf.
Damascus Steel Knives
Damascus steel looks stunning – the layered pattern is visually striking. But here's the truth: the pattern is purely aesthetic. Performance depends entirely on the base steels used. If you're buying Damascus, make sure it's from a reputable brand where you know the steel composition. Unknown Damascus from marketplace resellers is often overpriced for mediocre performance.
What Makes These Worth the Price
Premium knives use better blade steels (S30V, M390, CPM-S35VN) that hold edges longer and resist corrosion better. They're made in the USA or precision-manufactured in Taiwan with proper heat treatment. The fit and finish are noticeably better – no blade play, smooth action, tight tolerances. And they come with warranties and services (like Benchmade's LifeSharp) that budget knives don't offer.
Gifting Tip: Include a knife maintenance kit (~$20–$40) with premium gifts. A small bottle of pivot lube, a microfiber cloth, and a sharpening stone signal that you understand these are tools meant to be cared for.
Key Takeaway: Benchmade Bugout (
$150) and Spyderco Para 3 ($140) are the gold standard premium EDC knives. S30V steel and AXIS/compression locks justify the price. Add a maintenance kit to show genuine care.
Knife Gift Add-Ons and Accessories That Impress
Here's where most gift-givers miss an opportunity. You spend $50 on a knife, but adding $20–$30 in accessories transforms it from a good gift into a thoughtful, complete gift.
Whetstone or Sharpening Stone (~$25–$40)
A quality whetstone is the single best accessory for any knife gift. A King KW-65 whetstone (1000/6000 grit) retails around $30–$40 and is widely available. For outdoor knives, a Fallkniven DC4 dual-compound stone (~$30) is portable and excellent for field sharpening.
Leather Sheath (~$20–$50)
If you're gifting a fixed blade, a quality leather sheath is essential. It protects the blade and makes the knife feel complete. Custom leather sheaths can run $50+, but basic quality options are $20–$30.
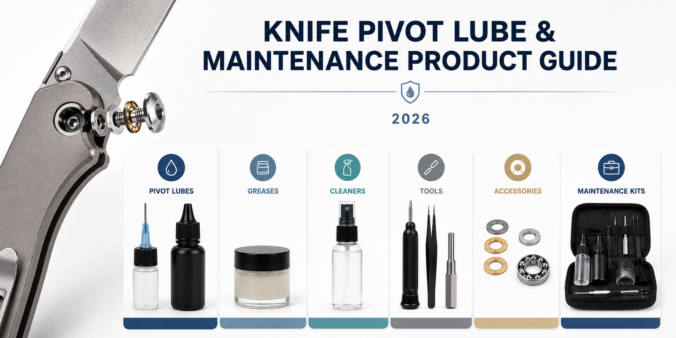
Pivot Lube and Maintenance Kit (~$10–$20)
A small bottle of knife pivot lube keeps folding knives operating smoothly. Benchmade and Spyderco both make their own. Pair it with a microfiber cloth and you've got a maintenance kit that shows you understand knives are tools that need care.
Knife Roll or Storage Pouch (~$30–$60)
For someone with multiple knives, a canvas or leather knife roll is both practical and impressive. It signals that you recognize they're a serious collector.
Personalized Engraving (~$15–$30)
Most major retailers and brands offer custom laser engraving. Benchmade charges $25 for engraving on select models. BladeHQ offers third-party engraving starting at $15. A name or initials on the blade or handle adds a personal touch.
The Accessory Bundle Strategy
Spent $50 on the knife? Spend $20 more on a sharpening stone. This shows you've thought beyond just the blade itself. It's the difference between a gift and a considered gift.
Key Takeaway: Add a $25–$40 whetstone to any knife gift. Pair premium knives with maintenance kits. Personalized engraving (~$20) adds a personal touch. Accessories transform a good gift into a thoughtful one.
Frequently Asked Questions About Knife Gifts for Men
Is it bad luck to gift a knife?
Direct Answer: The superstition that a knife gift "severs friendship" is a common folk belief, but it's easily neutralized – have the recipient give you a penny in exchange, which traditionally reverses the bad luck.
This is an old European and American tradition with no real basis. Many people gift knives without incident. If your recipient is superstitious, the penny exchange is a fun, lighthearted way to address it. Most knife enthusiasts don't worry about this at all.
What is a good budget for a knife gift?
Direct Answer: $40–$75 is the sweet spot for most gift-givers – enough to get a quality, reliable knife without overspending. Budget under $40 for casual users; $100–$150 for serious enthusiasts.
A $40 Kershaw Leek or CIVIVI Elementum is a genuinely useful gift that won't disappoint. If your recipient is a known knife enthusiast or serious cook, $100–$150 opens up premium options like Benchmade or Spyderco. Anything under $30 risks feeling cheap; anything over $200 should be reserved for collectors or major milestones.
Can I engrave or personalize a knife gift?
Direct Answer: Yes. Most major brands and retailers offer custom laser engraving for $15–$30, adding initials or a name to the blade or handle.
Benchmade offers custom engraving for $25 on select models. BladeHQ and other retailers offer third-party engraving services. Engraving adds a personal touch that makes the gift feel more special, though it's optional – many recipients prefer an unmarked blade.
What type of knife is most practical as a gift – pocket knife or kitchen knife?
Direct Answer: It depends on the recipient's lifestyle. A pocket knife (EDC) is more universally useful; a kitchen knife is better for someone who cooks regularly.
If you're unsure, go with an EDC pocket knife. Almost everyone can use a reliable folding knife for opening packages, cutting rope, or general utility. Kitchen knives are more specialized – only gift one if you know the person cooks. Outdoor/hunting knives are even more niche.
Are there any knives I should NOT give as a gift?
Direct Answer: Avoid cheap steak knife sets (they dull immediately), unknown Damascus knives (often overpriced for mediocre steel), and automatic knives unless you've verified they're legal in the recipient's state.
Also skip novelty knives with gimmicky designs or poor reviews. A $20 "tactical" knife from an unknown brand will disappoint. Stick with established brands like Kershaw, Spyderco, Benchmade, or Victorinox. And always check local blade length laws before gifting anything with a blade longer than 3 inches or any automatic mechanism.
What knife brands are most respected by enthusiasts?
Direct Answer: Benchmade, Spyderco, Kershaw, CRKT, and Victorinox are the most consistently recommended brands across knife communities and publications.
Case is one of the most collected knife brands in the world, with a history dating to the late 19th century. For outdoor knives, Mora (Swedish), Buck (American), and ESEE (American) have strong reputations. For kitchen knives, Victorinox and Wüsthof are the gold standards. These brands have proven track records and strong warranties.
Conclusion: The Right Knife Matters
A quality knife is one of the few gifts that actually improves with age. Unlike gadgets that become obsolete or clothes that wear out, a well-made knife becomes more familiar, more useful, and more valuable to its owner over time.
The key is matching the knife to the person. An EDC pocket knife for someone who never carries one. A kitchen knife for someone who cooks. A fixed blade for the outdoorsman. And if you're buying for a serious enthusiast, a premium option with better steel and a warranty.
Start with the price tier that fits your budget, then use the recipient's lifestyle to narrow down the category. Add an accessory – a whetstone, a sheath, or a maintenance kit – to show you understand knives are tools meant to be cared for. And if you're still unsure, Knife Depot carries over 10,000 knives and their staff can help you find the right fit.
A good knife is a gift that keeps giving. Make it count.
Related Reading
- Best Kershaw EDC Knives
- Liner Lock vs. Frame Lock: Knife Mechanism Comparison
- Full Tang vs. Rat Tail: Why Construction Matters
- Blade Steel Guide: S30V vs. 8Cr13MoV vs. M390